Hampton Bay ceiling fans have become a staple in many homes, offering a blend of style and practicality for maintaining comfortable temperatures. As with any popular product, curiosity often arises about its origins, leading to the question: “Who makes Hampton Bay ceiling fans?” This blog aims to answer that question and shed light on the manufacturer behind these widely used household fixtures. Additionally, we’ll explore who makes other Hampton Bay products, such as lights, countertops, cabinets, outdoor furniture, patio heaters, air conditioners, wired doorbells, dehumidifiers, electric heaters, umbrellas, blinds, laminate flooring, and gazebos.
Who Makes Hampton Bay Ceiling Fans?
Hampton Bay ceiling fans are manufactured by TAL (Air Cool Industrial Co., Ltd). TAL is a well-established company specializing in the production of ceiling fans and other electrical appliances.
TAL’s Role
TAL plays a crucial role as a vendor for The Home Depot, one of the largest home improvement retailers in the United States. They are responsible for manufacturing a wide range of ceiling fans that are sold under The Home Depot’s popular Hampton Bay brand.
Partnership with The Home Depot
TAL has a strong partnership with The Home Depot, supplying them with ceiling fans for not only the Hampton Bay brand but also other brands like the Home Decorators Collection. This partnership reflects TAL’s commitment to providing high-quality ceiling fans that meet the diverse needs and preferences of The Home Depot’s customers.
Who Makes Hampton Bay Products?
Hampton Bay is a private label brand owned by The Home Depot, meaning that the products are manufactured by various companies and then sold under the Hampton Bay name. Here’s a breakdown of some of the manufacturers associated with different Hampton Bay product categories:
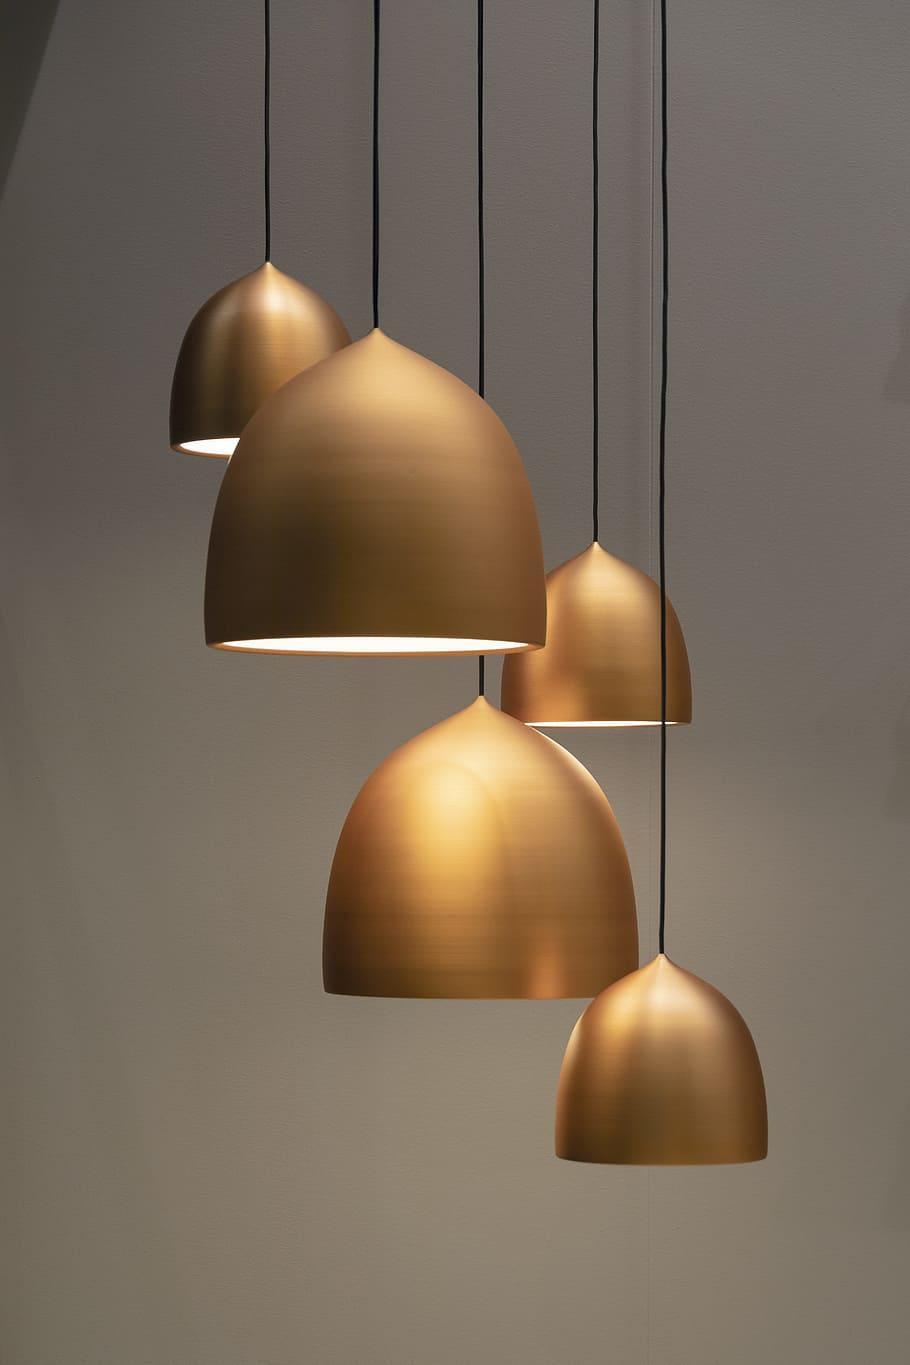
Lights
Hampton Bay lights are primarily manufactured by companies like Progress Lighting, Kichler, Quoizel, and others. These companies specialize in lighting fixtures and offer a wide range of styles and designs to suit different preferences.
Countertops
MSI Surfaces is a leading manufacturer of countertops and is known to be associated with making Hampton Bay countertops. They offer a variety of materials, including quartz, granite, and marble, to cater to different needs and budgets.
Cabinets
American Woodmark Corporation is a major cabinet manufacturer and produces Hampton Bay cabinets for The Home Depot. They offer various styles, finishes, and configurations to meet the diverse needs of homeowners.
Outdoor Patio Furniture
Hampton Bay outdoor patio furniture is made by several manufacturers, including Tropitone, Polywood, Sunjoy, and others. These companies specialize in outdoor furniture and offer a wide range of materials and styles to suit different preferences and budgets.
Patio Heaters
Sunglo is a manufacturer of patio heaters and is involved in making Hampton Bay patio heaters. They offer different types of heaters, including propane and electric models, to cater to various needs and preferences.
Electric Heaters
Lasko and Honeywell are two well-known brands that manufacture electric heaters and are among the manufacturers of Hampton Bay electric heaters. They offer a variety of models, including space heaters, baseboard heaters, and fan-forced heaters, to meet different heating requirements.
Overall, Hampton Bay products are made by a diverse group of manufacturers, each specializing in their respective product categories. This allows The Home Depot to offer a wide range of products under the Hampton Bay brand, catering to the diverse needs and preferences of its customers.
Who Makes Other Hampton Bay Home Products?
Hampton Bay offers a wide range of home products in addition to the categories mentioned earlier. Here are some of the manufacturers associated with other Hampton Bay products:
Air Conditioners
LG Electronics, a well-known brand for electronics and appliances, is associated with manufacturing Hampton Bay air conditioners. They offer various models with different cooling capacities and features.
Wired Doorbell
Heath Zenith, a company specializing in home security and automation products, is the manufacturer behind Hampton Bay wired doorbells. They offer different styles and features to meet various needs.
Dehumidifiers
Ivation Brands, a company specializing in home appliances, is involved in manufacturing Hampton Bay dehumidifiers. They offer different models with varying moisture removal capacities.
Umbrellas
The specific manufacturer behind Hampton Bay umbrellas is not explicitly mentioned. However, it’s likely that they are produced by multiple manufacturers specializing in outdoor furniture and accessories.
Blinds
Levolor, a well-known brand for window coverings, is associated with making Hampton Bay blinds. They offer various styles, colors, and materials to suit different preferences.
Laminate Flooring
Mohawk and Pergo are two leading manufacturers of laminate flooring and are among the companies that produce Hampton Bay laminate flooring. They offer various styles, colors, and textures to mimic the look of natural wood or stone.
Gazebos
Yardistry, a company specializing in outdoor structures, is involved in making Hampton Bay gazebos. They offer different sizes and styles to suit various outdoor spaces and preferences.
Significance of Knowing Manufacturers
Knowing the manufacturers behind Hampton Bay products is significant for several reasons:
Quality and Consistency
Each manufacturer has its own standards and reputation for quality. By knowing the specific manufacturer, consumers can research their track record and assess the likely quality and consistency of the Hampton Bay product. For instance, a Hampton Bay ceiling fan made by a reputable manufacturer like Monte Carlo is expected to have superior quality and durability compared to one made by a lesser-known company.
Customer Confidence
Understanding the manufacturing process can instill confidence in customers when choosing Hampton Bay products. Knowing that a product is made by a company with expertise in a particular category, such as LG for air conditioners or American Woodmark for cabinets, can assure customers that they are getting a well-designed and reliable product.
Warranty and Support
The manufacturer is often responsible for providing warranty coverage and customer support for Hampton Bay products. Knowing the manufacturer can help customers easily access warranty information, register their product, and seek assistance in case of any issues or defects. For example, if a Hampton Bay air conditioner malfunctions, knowing that it’s made by LG can direct customers to the appropriate channels for warranty claims and technical support.
Conclusion
In conclusion, Hampton Bay products are manufactured by a diverse range of companies, each specializing in different categories of home goods. From King of Fans for ceiling fans to Midea for air conditioners, Hampton Bay collaborates with reputable manufacturers to provide consumers with a wide selection of quality products.
When choosing Hampton Bay items for your home, consider the specific manufacturer behind each product and their reputation for quality and reliability. By understanding the origins of these products, you can make informed decisions that enhance your living spaces with functional and stylish home goods.
Whether it’s a ceiling fan, a patio heater, or a set of kitchen cabinets, Hampton Bay’s diverse range of manufacturers ensures that you have access to a variety of options to suit your needs and preferences.
Who does not like upgrading their home interior occasionally? If you want incredible home accessories options, I suggest checking out Hampton Bay. Hampton Bay is one of the US leading trusted brands that launches tons of adorable home accessories, electronics and related articles yearly. Accept it or not, we are always concerned about changing our furniture and neglecting our ceilings. So, for this time, I suggest you install a Hampton Bay Ceiling fan light kit that can add a touch of elegance to your ceiling fans. Installing and removing a light kit can be hard and confusing for the first time; that’s why we have designed this Hampton Bay Ceiling Fan Light Kit installation and removal guide for you.
If you have decided to install a Hampton Bay Light Kit on your fan and don’t know how it’s done, then you deserve a gentle pat on your shoulders because you are in the right place. This blog post will explore the accurate process behind successfully installing and removing a light kit on a Hampton ceiling fan. So, are you excited to learn all that? Let’s get started!
Installing a Light Kit on a Hampton Bay Ceiling Fan
Let’s first learn the accurate and step-by-step method of installing the adorable Light Kit on your grand Hampton Bay Ceiling Fans. Shall we?
Step-by-Step Installation
First, you will switch off the fan or turn off any power supply to ensure your safety.
Next, you will examine the bottom of your Hampton Bay Fan to find if there are housing cap screws. Unscrew all three screws securing the housing cap.
Then, you will move the housing cap center plug out of its position.
Once the housing cap center plug is removed, insert all the light kit wires into the housing cap through the opening.
Afterward, you will carefully connect the housing cap with a Hampton Bay Light Kit.
And here comes the big task of connecting the wires of the light kit with the ceiling fan. You will connect the light kit’s white wires with the ceiling fan’s white cable and the black ones with the black wires of the ceiling fan. Make sure to double-check that the connections are made accurately.
Then, you will bring the two connected wires together and secure them by affixing a wire nut at one end.
Recheck all the connections and nuts properly and cover them in electronic tape.
Finally, you will install the Light kit And, now your favorite Hampton Bay Light Kit is ready to rock on your ceiling fans.
Testing of the installed Hampton Bay Light Kit
After installing the light kit, testing ensures the wire connections are done correctly. To test the light kit, you will switch on the previously turned-off power supply and check that all the bulbs are lit and the fan is functioning properly.
Tools and Materials
Just like every soldier carries all their weapons to the battleground, you’ll also need all the tools and materials at hand while dealing with electronics to prevent electrical accidents. A few important instruments while installing a Hampton Bay Light Kit are
Hampton Bay fan light kit because you are going to install it.
Screwdriver for screwing and unscrewing the nuts while installing a light kit on your Hampton Bay Fan.
Wire strippers for stripping the protective covering on the light kit and ceiling fan wires.
Electrical tape insulates the coupled wires of the light kit and the fan.
Ladder for reaching the ceiling fan.
Safety spectacles for protecting your precious eyes while installing a fan.
Electrical Safety Precautions and Other Considerations
Electricity is a useful and equally horrible natural asset, and any mishandling can end up in a grave. Yes, you have heard that right! So, it is best to practice care while handling an electrical appliance.
Before installing the light kit, you will ensure the circuit breakers are turned off.
You should not overtighten the screw.
Make sure that you insulate all the accurately coupled wires with electronic tapes.
If you are confident about installing the light kit yourself. You should call any skilled electrician right away.
Removing a Light Kit from a Hampton Bay Ceiling Fan
Are you planning to replace your old light kit with the incredible Hampton Bay Light Kit? Then, kudos to you because we have the accurate method below. Here’s how it can be done.
Step-by-Step Removal method
Start by turning off the circuit breakers at the power distribution board to switch off any power supply because you know safety comes first.
Then, you will carefully remove all the bulbs hiding inside the light kit and set these aside.
Next, you will examine the bottom of the fan to find the two humble and diligent screws holding the entire light kit unit.
You will carefully unscrew these two screws while holding the light kit to prevent it from dropping.
You will have access to all the connected wires and nuts once the light kit assembly is removed from the fan. All the cables in the housing caps are securely coupled with electronic tapes and wire nuts. So, you will need to exercise care while disengaging the wire and unscrewing the nuts because we know that you don’t want to damage any wire and end up buying a new ceiling fan. Do you?
Finally, you will remove the light kit carefully. You can ask a homie for help while doing all this.
Safety Precautions
And here comes the safety alerts and other considerations must be considered while separating a light kit from the ceiling fan because your life is more precious than anything else.
Never try to remove the Hampton Bay Light Kit with the power supply on because It’s like an open invitation for death.
Don’t overdo the screws because it will damage the fan.
Stripped wires will be your biggest enemy in this battle, so handle them carefully.
Disconnecting Wiring
Disengaging the paired wires and electrical connections yourself can be tough and risky. So, be very careful and follow the below-given steps to keep electrical hazards at bay!
First, you will unwrap the electronic tapes, forcing the light kit wires to embrace the ceiling fan wire tightly.
Then, you will loosen the nut at the bottom of the two paired wires.
Separate the fan wires from the light kit wire and disengage the light kit from the ceiling fan.
Once the light kit is removed, you will attach the wire nuts at the ends of a single fan wire.
Finally, you will cover all the wires in the fan housing cap with electronic tapes to insulate them.
Restoring the Fan
Restoring the fan’s primary configuration and functions will require you to follow all the light kit installation steps in the correct sequence in the counter order without the light kit set up.
You will remove the light kit from your fan by following the steps mentioned. Once the light kit is removed, you will attach the wire nuts at the ends of every fan wire.
Finally, you will cover all the wires in the fan housing cap with electronic tapes to insulate them. And congratulations, you’ve completed the wiring part.
Following the hard wiring part comes the task of screwing the housing cap back to its position. For this final step, you will bring the housing cap in contact with the fan and firmly secure it by screwing all three nuts. And hey! Don’t over-screw the nuts.
And there you have it, your ceiling fan back in its initial configuration.
Conclusion
Hampton Bay has the best collection of light kits and other home décor articles to slick up your space. If you want to uplift your ceiling fan game, then a Hampton Bay Light Kit can be a nice addition to your ceiling fans. The fun part is that you can remove your old and boring light kit and install a new Hampton Bay Light Kit in its place by following a few basic steps in precise order. Doing this will enhance your electrical wiring skills and save money from shelling out on the electrician bills. Also, you must be cautious while connecting wires and dealing with electricity to ensure your safety and prevent horrible electrical accidents. However, if you are doubtful about installing the light kit, it is best to call an electrician immediately because your life safety is the top priority!
And that’s all for today’s blog post. We hope that reading this blog post has kicked all your doubts and concerns out of the way. Did you know this Hampton Bay Light Kit installation and removal method before? Have you ever installed a Hampton Bay Light Kit on your ceiling fans? Were you able to do it perfectly? What hurdles did you face? Please share your experiences with us in the comment box and get the comment section going. As always, we would love to hear from you!
With fall just around the corner, let’s remove the dehumidifier from storage and remove the covers. Alternatively, if you plan to buy a new Hampton Bay Dehumidifier, you are in the right place. This blog post will guide you through all the troubleshooting issues and their solutions that you should know before investing in a dehumidifier. Hampton Bay is one of the members of the Home Depot huge family and the United State’s beloved and trusted brand for stunning home décor and home appliances. This Huge name for home furnishings launched its dehumidifier to solve America’s indoor air quality issues, especially in spring and summer. The purpose behind launching a huge range of dehumidifiers was to ensure that customers get the best unit at the best price.
So, whether you are looking for your HB40 troubleshooting solution or want to learn about the best Hampton Bay dehumidifier at the best price, this blog post has got you covered. So, without any further ado, let’s get started!
Understanding Hampton Bay Dehumidifiers
Hampton Bay has launched 59 different yet incredible models of dehumidifiers to offer their customers a huge variety of dehumidifiers to choose from. The most popular are obviously the advanced ones, including the series of HB30 (HB30-G, HB30-H, HB30-K, HB30-L, and HB30-X), and the HB40 series includes 19 different models ranging from model type A to type V. Another famous Hampton Bay Dehumidifier HB50 series comprises 12 different models.
Now let’s learn about the specifications of these three different hyped models.
Model HB40 specifications: The HB40 model is designed with an average-sized capacity. It is a 40-pints damp humidifier with a timer and attached to a built-in bucket.
Model HB30 Specifications: It is a 30-pint portable dehumidifier with tiny rooms that comes with a convertible moisture sensor, timer, discharge pipe, and built-in bucket.
Model HB50 Specifications: it is designed as a 50 pints humidifier with the same features as the HB30.
Besides these specifications, all three models have automated air-conditioning arrangements. These arrangements have room humidity detection settings that adjust the humidity levels accordingly and can even turn off the humidifier when required. The huge perk of Hampton Bay Dehumidifiers’ automatic arrangements is minimizing the power consumption.
So, with Hampton Bay Dehumidifiers by your side, you can wave goodbye to the annoying humidity in the air with a sense of honour that comes from knowing that you are conserving energy.
Common Issues with Hampton Bay Dehumidifiers
In this section, we have addressed a few regular yet unignorable issues with the Hampton Bay Dehumidifier.
Quiet Operation: Bedrooms are those comfortable places in your home where you come to enjoy your well-deserved rest after a long and tiring day. Even though the Hampton Bay Dehumidifier comes with a guarantee of quiet operation, it may sometimes disappoint you and make unusual sounds. But the good news is that this issue can be solved by cleaning the air filters or lubricating the motor fan.
Drain Hose Problems: Every dehumidifier is fitted with a drainage pipe. Sometimes you may come across some problems with the working of the outlet hose. In that case, you will ensure the hose is free from clogs and dust. If you spot any drainage outlet blockage, then it’s time to get that out. Sometimes, you will also need to replace the defective hose with a new one. While fitting a new drainage pipe, ensure that it is positioned and adjusted appropriately.
Troubleshooting Tips for Hampton Bay Dehumidifiers
Hey! Are you frequently experiencing problems with your Hampton Bay Dehumidifier? Here’s what might be the culprit behind the issues that you are facing.
No Power:
Whenever you find that your Hampton Bay Dehumidifier is acting like a stubborn kid who doesn’t follow what’s being told, the most reliable course of action would be to check the appliance cord connections with the power supply. Suppose the dehumidifier is properly connected to the switch, in that case, you should examine the switchgear for defects and try connecting the power cord of the dehumidifier with a different switch outlet. If the humidifier does not turn on after all this, then it’s time to seek help from the expert team of Hampton Bay.
Low Dehumidification:
If you are not satisfied with your Hampton Bay Dehumidifier’s working, then try readjusting the dehumidifier humidity levels and repositioning the unit centrally in the room. You will also need to ensure the dehumidifier’s dimensions are suitable for the room where it is being installed. And above all exercise care while using the dehumidifier and ensure the air scrubbers are properly cleaned. Finally, you can contact Hampton Bay Support for assistance and expert advice.
Unusual Noises:
Nothing can beat the discomfort brought on by bizarre sounds emanating from machinery. If your Hampton Bay dehumidifier is making unusual sounds, then there must be some problem inside it. To take the edge off your humidifier’s sorrows and cries, put it on a flat surface and make sure that it doesn’t touch your precious home furnishings. Following that, you will clean the humidifier ventilation arrangements and check that the fan motor is well lubricated. If the noise doesn’t seem to go away after all this, then the option of contacting Hampton Bay customer support is always there.
Frost Buildup:
Are your Hampton Bay dehumidifier coils constantly icing up? Then fear not because we have the fix-it trick.
First up, you will disconnect the dehumidifier cord from the outlet after switching it off.
Then, you will let the dehumidifier to de-ice for 24 hours.
Once the defrosting is done, wipe the wet coils with a clean cloth or a soft brush.
Plug in the dehumidifier cord in the switch and see if it works.
If frost buildup is a routine matter for your dehumidifier, then don’t hesitate to contact Hampton Bay customer support.
Referencing the Hampton Bay Dehumidifier Manual
We bring you the Hampton Bay Dehumidifier Manual, as your ultimate guide for enhancing your troubleshooting experience and solving the dehumidifier operating issues once and for all. The aim behind designing the manufacturer’s manual was to overcome customers’ concerns about units’ operation while sitting in the comfort of their homes and save their trips to Hampton Bay’s office.
We would highly recommend you read the Hampton Bay Dehumidifier Manual before starting your journey with Hampton Bay’s Products. You may know the quick-fix trick before you get into trouble with your dehumidifier.
Locating the Manual: How do we get the Hampton Bay Dehumidifier manual?
First up, you will visit the Hampton Bay official website.
Next, you will scroll down the screen for “Support” or “Manuals” options. You will tap on these options and open the humidifier tab.
Once the humidifier tab is displayed on the screen, you will see the button for downloading the Hampton Bay Dehumidifier Manual. And you are done!
How to Use the Manual properly?
Now, let’s explore the correct method of using Hampton Bay’s Manual.
The manual is categorized into different sections to locate the required information easily.
The first section of the manual is all about dehumidifier working, management, and maintenance.
In the next or the second section, you will find content related to usual troubleshooting guidance.
You will check the relevant manual section for solutions after identifying the nature of the problem.
However, if you are unsure about fixing the trouble yourself at home, then you can put it in the professional hands of Hampton Bay’s team at any time.
Price and Value
This section will help you find the best Hampton Bay Dehumidifier that best fits your budget and fulfils your needs, as we have already discussed the different available models of Hampton Bay Dehumidifier, including HB40, HB30, and HB50. So, the unit’s price will vary depending on the model size and capacity.
Hampton Bay Dehumidifier Prices:
Now let’s look at the prices
Model HB40 Price: The HB40 series covers 19 different models, available in the price range of $200-$250.
Model HB30 Price: The prices for all the models categorized under the HB30 class are adjusted between $150-$200.
Model HB50 Price: Here comes the priciest one! HB50 is the Hampton Bay grand dehumidifier model, designed in 12 styles. All these 12 models’ prices have been set between $250-$300.
Value for Money:
Considering the prices, a one-time investment in Hampton Bay Dehumidifier can be tough on your wallet, but features like automatic dehumidification, modifiable humidistats and built-in water tanks make it worth a try. Besides, all Hampton Bay Dehumidifiers have a warranty for no-cost servicing and free maintenance for any damage within a year.
Safety Considerations
They say that Safety comes first, and they are right to say so. Dealing with electrical appliances can be risky as any carelessness can land you directly on the hospital bed. Practising electrical safety measures while fixing and dealing with electrical appliances is important.
Dear Reader, your safety is totally in your own hands so make sure that you follow the following tips while operating a dehumidifier.
It would be best if you use grounded switch outlets.
Discard any damaged power cord immediately.
Don’t operate the dehumidifier with wet hands or on wet surfaces.
The unit must not be placed close to a heated object. Always make sure that the dehumidifier is positioned in a proper dry environment.
Never clean the dehumidifier’s air filters and coils with a plugged-in switch.
Maintenance: Apart from safety considerations, regular unit maintenance and monthly service are the keys to enhancing the unit’s life. Some easy and practical maintenance tips are as follows.
Air filters have a huge job in a dehumidifier, so make sure you clean them regularly with a clean and disinfected cloth.
Every Hampton Bay Dehumidifier is fitted with a water tank. The water in these tanks must be drained properly and regularly.
Take your time with scheduling a monthly dehumidifier servicing by a skilled technician.
Conclusion
It won’t be wrong to say that Hampton Bay has earned its place as a trusted home appliances brand in the US trade market. The biggest contribution of Hampton Bay is keeping American houses free from molds and improving air quality by launching its 59 different dehumidifier models in various sizes to facilitate customers in selecting of most suitable dehumidifiers. Hampton Bay Dehumidifiers are pricy; however, they are worth the money. Besides, you may run into issues with the operations of the dehumidifier; that’s why the units come with a troubleshooting guide manual. These manuals are designed as a go-to source for solving basic troubleshooting issues while sitting in the comfort of your home. The environment greatly influences the life and working of your Hampton Bay Dehumidifier, so make sure you store it in a clean and dry place.
And there you have it! We hope that you enjoyed learning about common issues and quick fixes for your Hampton Bay Dehumidifier in this comprehensive blog post. Do you have a Hampton Bay Dehumidifier at home? What troubles do you face with it? How about sharing your experience with us? Sound off in the comment box and get the comment section going. As always, we would love to hear from you.
If you have were given a Hampton Bay patio heater, then you definitely definately comprehend that it is an important a part of your out of doors fixtures. These heaters should make the coldest nights extra snug, and they may be capable of add a touch of splendor to any patio. But what do you do in case you lose or harm a chunk of your heater? Don’t worry – we’re right here to assist! In this weblog post, we will let you recognise wherein to locate alternative elements on your Hampton Bay patio heater, and we are capable to reveal you the manner to update them if important.
What is a Hampton Bay patio heater?
A patio heater is a device that allows to heat up an out of doors region, making it greater comfortable to spend time in. A Hampton Bay patio heater is a tremendous way to experience your out of doors region throughout the cooler months. This kind of heater uses herbal fuel or propane to create heat, making it a stable and green way to keep warmness.
If you’re seeking out a patio heater with a purpose to offer plenty of warmth and style, a Hampton Bay patio heater is a incredible choice. These warmers come in loads of special designs, and that they can be powered via strength, fuel, or even solar power, so you can find one that fine fits your wishes. Whether you’re seeking out a traditional or present day design, there’s a Hampton Bay patio heater to fit your flavor.
How does the patio heater work?
The patio heater uses a unique infrared heating gadget that is completely safe and smooth to use. This machine doesn’t produce any dangerous emissions, making it a wonderful desire for folks who are looking for an environmentally friendly option.
The patio heater is likewise very green, offering a warm and snug surroundings without the usage of quite a few power. This makes it a brilliant desire for people who want to store cash on their heating payments.
Hampton Bay Patio Heater elements and their features
There are many exceptional components to a Hampton Bay Patio Heater, every with its personal unique feature.
Here is a listing of Hampton Bay patio heater parts:
Base: The base is the lowest part of the Hampton Bay patio heater. It is generally made of metal or plastic and sits on the floor.
Pole: The pole is a part of the Hampton Bay patio heater that extends from the base to the pinnacle of the unit.
Head: The head is the top part of the Hampton Bay patio heater. It is wherein the heat supply is located and wherein the warmth is emitted from.
Control Panel: The manipulate panel is located at the facet of the Hampton Bay patio heater. It is used to show the unit on and off, as well as to adjust the settings.
Igniter: The igniter is a small button on the manage panel this is used to ignite the patio heater.
Fuel gauge: The gasoline gauge is located at the manage panel and is used to measure the quantity of gas in the unit.
Regulator: The regulator is positioned at the manage panel and is used to regulate the glide of gasoline to the unit.
Pilot slight: The pilot slight is located on the manipulate panel and is used to ignite the gasoline.
Thermostat: The thermostat is located on the manipulate panel and is used to control the temperature of the unit.
Reflector: The reflector is placed on the head of the Hampton Bay patio heater. It is used to mirror the warmth backpedal towards the ground.
Wheels: The wheels are placed on the bottom of the Hampton Bay patio heater. They are used to transport the unit from one place to some other.
Hampton Bay Patio Heater: Pros, Cons, and Verdict
PROS
Affordable
Attractive design
Easy to assemble
Heats up quickly
Mounting option
A wide range of BTUs
Both natural gas and propane versions
Affordable
The Hampton Bay patio heaters are some of the most cheap on the market, making them a superb desire for price range-minded consumers.
Attractive layout
The attractive design of the Hampton Bay patio heaters will supplement any out of doors décor.
Easy to gather
These warmers are clean to assemble, so that you can revel in your new patio heater in no time. This is a terrific characteristic as some patio warmers can be difficult to prepare.
View Assembly Instructions / Manual
Heats up speedy
The Hampton Bay patio heaters warmth up quickly, so you can experience your out of doors area even on cooler days.
Mounting alternative
You can mount the Hampton Bay patio warmers in your patio or deck for delivered balance.
A extensive range of BTUs
Hampton Bay patio warmers are available in a extensive range of BTUs, so that you can discover the suitable heater in your needs.
Both natural gasoline and propane variations
The Hampton Bay patio heaters are to be had in each herbal fuel and propane variations.
CONS
Instructions difficult to follow
Limited warranty
Insufficient heat output
Noisy operation
The heater’s height was too high
Expensive to operate
Regular tank refill requirement
Unpleasant smell
Instructions difficult to follow
Some reviewers found the instructions for the Hampton Bay patio heaters to be difficult to follow.
Limited warranty
The Hampton Bay patio heaters come with a one-year warranty. Some people felt that this was too short and that the heaters should come with a longer warranty.
Insufficient heat output
The heat output of the Hampton Bay patio heaters may not be sufficient for very large outdoor areas.
Noisy operation
Some reviewers found that the Hampton Bay patio heaters are noisy when in operation.
The heater’s height was too high
Some people thought that the height of the Hampton Bay patio heaters made them difficult to use.
Expensive to operate
The Hampton Bay patio heaters may be more expensive to operate than other types of heaters as they use either natural gas or propane.
Regular tank refill requirement
If you use the Hampton Bay patio heaters with propane, you will need to refill the tank on a regular basis.
Unpleasant smell
Some reviewers noted that the Hampton Bay propane patio heaters produce an unpleasant smell when in use.
VERDICT
The Hampton Bay patio heaters are an excellent choice for finances-minded shoppers who are looking for an low cost and appealing heater for their outdoor area. These heaters are smooth to bring together and may be hooked up on your patio or deck.
They come in each natural gasoline and propane versions and have a huge variety of BTUs to pick from. The primary disadvantage to these heaters is that some reviewers found the commands hard to follow and that the guarantee is most effective for twelve months.
Additionally, the warmth output might not be sufficient for terribly massive areas. But typical, the Hampton Bay patio warmers are an amazing desire for those inside the marketplace for a brand new patio heater.
How to select the right Hampton Bay Patio Heater to your needs?
When choosing a patio heater, it’s miles crucial to consider your precise wishes. There are many different sorts and models of patio warmers on the market, so it is essential to do your studies before creating a buy.
To select the right patio heater in your needs, you’ll need to take into account the subsequent elements:
The size of your patio or deck
The climate in your area
Type (gas/electric heater)
Type of fuel
Your budget
The size of your patio or deck
It is the main factor in choosing the right patio heater. If you have a small area, then a portable patio heater would be your best option. For a large patio or deck, a mounted patio heater would be better.
The climate on your location
It will even play a position in choosing the right patio heater. If you stay in a place with a number of snow and cold winters, then an electric patio heater could be a higher desire. If you stay in a heat climate, then a gas patio heater could be a better alternative.
Type (gasoline/electric powered heater)
There are two most important forms of patio warmers: gasoline and electric powered. Gas patio warmers are more highly-priced to buy and perform, however they offer extra warmth than electric patio heaters. Electric patio heaters are much less high-priced to purchase and perform, however they do not offer as a good deal warmth as fuel patio warmers.
Type of gasoline
There are three primary styles of fuels utilized in patio warmers: propane, natural gas, and energy. Propane is the maximum expensive form of fuel, however it is also the maximum effective. Natural gasoline is less high priced than propane, however it isn’t always as powerful. Electricity is the least high-priced sort of fuel, however it’s also the least effective.
Your budget
Of path, your budget can even play a function in selecting the right patio heater. If you’ve got a limited finances, then an electric powered patio heater could be a better alternative. If you have a larger price range, then a fuel patio heater might be a better choice.
Once you’ve got considered all of these factors, you’ll be capable of pick the right patio heater in your wishes.
Types of Hampton Bay Patio Heaters
Hampton Bay is a cross-to brand for patio heaters. They provide many distinct styles of fashions, every prepared with special capabilities and benefits.
If you are seeking out a Hampton Bay patio heater, some of the maximum famous kinds include:
Infrared Heaters
Propane Heaters
Natural Gas Heaters
Electric Heaters
Infrared Heaters
Hampton Bay Infrared patio warmers work through the usage of short-wave radiation to create warmth, much like the way the solar’s rays heat the Earth. These warmers are very green because they most effective warmness the gadgets and surfaces that they come into contact with, rather than heating the air round them. Infrared patio warmers are available in both electric and fuel-powered models.
Propane Heaters
Hampton Bay Propane patio warmers are a form of gasoline-powered patio heater. They use propane fuel to create heat, which is then disbursed thru the use of a fan. Propane patio warmers are very powerful and might provide a lot of warmth, making them an amazing desire for large patios or decks.
Natural Gas Heaters
Hampton Bay Natural gasoline patio heaters are another sort of gas-powered patio heater. They use herbal gas to create warmness, which is then disbursed thru using a fan. Natural gas patio heaters are less expensive to perform than propane patio heaters, however they may be no longer as powerful. Not best are herbal gas heaters environmental-friendly, but additionally they don’t launch any risky emissions.
Electric Heaters
Hampton Bay Electric patio heaters are the maximum popular type of patio heater. They use strength to create heat, that is then distributed thru the use of a fan. Electric patio warmers are less steeply-priced to purchase and function than fuel-powered patio warmers, however they’re not as effective.
Hampton Bay patio heaters are a extremely good manner to extend your out of doors living space. With such a lot of different types to pick from, you’re certain to find one it is perfect on your wishes.
Patio Heater Energy Efficiency: Propane or Electric?
When it involves Hampton bay patio warmers, of the maximum popular selections are propane and electric. But which one is extra strength efficient?
Propane patio warmers are commonly more high-priced to function than electric ones. However, they have a tendency to be greater efficient in phrases of warmth output.
Electric patio heaters are less high priced to perform, however they’ll now not provide as much warmness output as propane models.
So, which sort of patio heater is more strength efficient? It truly depends to your specific needs and possibilities. If you need the maximum warmness for your cash, then a propane patio heater may be the higher choice. However, if you’re on a finances and don’t mind sacrificing a few warmness output, then an electric powered patio heater may be a higher choice. Whichever way you cross, make sure to do your studies and choose the patio heater it is right for you.
Hampton Bay 48000 Stainless Steel Heater
This 48000 BTU Hampton Bay patio heater is best for those chilly evenings spent outside. Its layout is both fashionable and practical, with an aluminum reflector and a long lasting stainless steel body. This heater runs on liquid propane and gives up to ten hours of heat on a 20-lb. Tank (not blanketed). It capabilities an easy-to-use push-button ignition, and its adjustable warmth manipulate permits you to customize the quantity of heat you want. With a safety close-off transfer and tip-over protection, this Hampton Bay patio heater is a safe and dependable manner to experience your outside area all year long.
Hampton Bay 48000 BTU Stainless Steel Patio Heater Manual
Drawbacks of Hampton Bay 48000 stainless steel heater
The Hampton Bay 48000 is a bit more expensive than other patio heaters on the market.
This heater is not suitable for use in windy conditions, as the flames can be blown out.
The Hampton Bay 48000 is a chunk hard to gather, and you could want two people to do it.
This heater is not very portable, as it’s far pretty heavy and cumbersome.
Despite the drawbacks, the Hampton Bay 48000 is a properly-made and powerful patio heater so as to maintain you heat on the ones cold nights. With its fashionable design and adjustable warmth manipulate, it’s miles a fantastic choice for any patio or deck.
Hampton bay Briza Infrared Patio Heater: Bring Elegant Heating to Your Patio
The Hampton Bay Briza Infrared Patio Heater is a extremely good manner to deliver fashionable heating on your patio. This patio heater functions a beautiful bronze finish that is certain to supplement any out of doors space. With its effective infrared heating element, this patio heater is positive to maintain you heat and toasty on the ones chilly nights.
This patio heater not best presents warm temperature however also features a built-in LED mild and Bluetooth speaker. The LED light is best for lights up your outside area at night time, whilst the Bluetooth speaker permits you to flow song from your phone or other devices.
Additionally, the Hampton Bay Briza Patio Heater comes with a convenient far off control, making it easy to alter the temperature in your desired level.
If you’re seeking out a patio heater that will maintain you warm and toasty on the ones chilly nights, then the Hampton Bay Briza Infrared Patio Heater is the correct desire for you. With its powerful infrared heating element and integrated LED light and Bluetooth speaker, this patio heater is sure to make your outside space greater enjoyable.
Best Heat-Focusing Heater: Hampton Bay Bromic Heating Portable 38500 BTU Patio Heater
When it comes to patio heaters, there are a lot of options on the market. But if you’re looking for a heater that will really focus the heat and make your outdoor space cozy, the Hampton Bay Bromic Heating Portable 38500 BTU Patio Heater is a great option.
This patio heater features a unique design that allows it to direct the heat in a specific direction. So, whether you’re wanting to warm up a small seating area or keep yourself comfortable while you’re working on your patio, this heater will do the job.
Best Portable Patio Heater: Hampton Bay 11,000 BTU Powder Coated Bronze Tabletop Patio Heater
The Hampton Bay 11,000 BTU Powder Coated Bronze Tabletop Patio Heater is the best portable patio heater on the market. It is made of durable material and has a stylish design that will complement any patio décor.
This patio heater has a effective 11,000 BTU warmness output with the intention to keep you heat on cool evenings. The powder-lined bronze end is climate resistant and will look extremely good for years yet to come. The Hampton Bay Tabletop Patio Heater comes with an easy-to-use igniter and a safety shut-off valve for your protection.
It also has an adjustable warmth manage knob so that you can select the perfect temperature for your desires. This patio heater is easy to assemble and is derived with a one-yr constrained warranty.
Best Overall Patio Heater: Hampton Bay AZ Patio Heaters HL Series Patio Heater
If you are searching out a patio heater to be able to provide both warmth and style, the Hampton Bay HL Series Patio Heater is a incredible choice. This patio heater capabilities a fashionable layout with an aluminum frame and a stainless-steel finish. It also has a built-in LED mild that makes it ideal to be used on your patio or deck. The HL Series Patio Heater also functions a large tank that could keep up to 20 gallons of propane, so that you’ll in no way need to fear approximately jogging out of gasoline. And with a most output of forty five,000 BTUs, this patio heater is positive to preserve you heat on even the coldest nights.
Why does my patio heater burn out?
There are a few reasons your patio heater can be burning out:
The maximum common purpose is that the pilot light isn’t lit. If the pilot light isn’t always lit, the gasoline will not go with the flow to the burner and the heater will no longer work.
Another commonplace purpose is that the gasoline valve isn’t open. If the gasoline valve is not open, the gasoline will not go with the flow to the burner and the heater will no longer paintings.
Another reason can be that the burner is dirty. If the burner is dirty, the flame will not be able to burn as hot and as correctly, leading to a shorter lifespan to your patio heater.
Finally, if the regulator is not set efficiently, the fuel pressure will now not be accurate and the burner will now not work effectively.
If your patio heater is burning out, it is important to first check that the pilot mild is lit and that the fuel valve is open. These are both running correctly, then you may test the burner to look if it desires to be wiped clean. If the burner is easy and the fuel pressure is accurate, then you may want to replace your patio heater.
Common issues with Hampton Bay patio heater and their solution!
The maximum common hassle that human beings have with their patio heaters is that the pilot mild is going out. If this happens, you will need to replace the whole burner meeting. The desirable news is that this is a surprisingly clean restore and best calls for some equipment.
Another commonplace trouble is that the patio heater does not produce enough warmth. This is normally due to a clogged burner. You can smooth the burner via removing it and soaking it in a solution of vinegar and water.
If your patio heater is leaking gasoline, you will need to replace the O-ring at the fuel valve. This is a incredibly clean restore, however you may need to make sure which you get the proper length O-ring.
Finally, if your patio heater simply isn’t always working, you may want to update the whole unit. This is often a last resort, but it is viable. You’ll want to touch a professional to try this, as it is able to be dangerous.
If you are having problems with your patio heater, don’t melancholy! There are a few easy fixes that you could attempt. And if all else fails, you could usually touch a expert for assist.
How might you discover any a part of your patio heater that wishes to get replaced?
If you be aware that your patio heater isn’t functioning as properly because it used to, there are a few things you can check to see if any elements need to be replaced.
First, take a look at the gasoline supply. If you’re the use of propane, test the connections to make certain they’re stable and there aren’t any leaks.
Next, take a look at the igniter to see if it is sparking. If not, you can want to replace the batteries.
If the igniter is sparking but the heater still will not mild, there may be an difficulty with the gas go with the flow.
Check to look if the gasoline valve is open and if there’s enough propane within the tank.
If your patio heater still isn’t working, it can be time to replace the burner. This is typically the maximum costly part of the patio heater, so that you will want to ensure that that is indeed the problem earlier than buying a brand new burner.
If you have got accompanied those steps and your patio heater continues to be no longer working, it’s far quality to seek advice from a expert. They could be capable of speedy diagnose the hassle and get your patio heater up and going for walks again very quickly. Thanks for analyzing!
Hampton Bay Patio Heater Replacement Parts: Where and How to Locate
If you’re in need of Hampton Bay patio heater replacement parts, you’re not alone. Many people find themselves in this same situation, especially if they’ve had their patio heater for a while. But don’t worry, we’ll tell you everything you need to know about finding replacement parts for your Hampton Bay patio heater.
Home Depot Website Search Bar
Home Depot 1-877 Parts Replacement Department Number
Amazon Website Search Bar
Sears Parts Direct
eBay Website Search Bar
Craigslist: How To Find Your Patio Heater Parts
Home Depot Website Search Bar
The Home Depot website is a great place to start when looking for Hampton Bay patio heater parts. Type “Hampton Bay Patio Heater Parts” in the search bar, and you should get plenty of results. You can then narrow it down by model number if necessary. But honestly, there are not many parts available so the next option may be better.
Home Depot 1-877 Parts Replacement Department Number
If you can’t find what you’re looking for on the Home Depot website, calling the 1-877 Parts Replacement Department at Home Depot is your next best bet. The department has a wide selection of replacement parts for Hampton Bay patio heaters.
Here are the steps to find replacement parts for your Hampton Bay patio heater at Home Depot:
Identify the UPC number for your Hampton Bay patio heater (e.g., the UPC number for the Hampton Bay 48000 Btu heater is 844091000347).
If you can’t find the UPC number, visit upcitemdb site to look it up using the search bar.
Make sure to call the Parts Replacement Department during their hours of operation: Monday-Friday 8 am-7 pm, and Saturday 9 am-6 pm.
When you call in, select Option 4 for Hampton Bay products from the list available on the call.
After selecting Option 4, you will be asked to confirm your selection by dialing a number, so select either Option 2 or 6.
You may also try Option 4 for Fireplace and then you will talk to a real operator who will help you find the desired part.
The Home Depot representative will check your product warranty (which must be within two years).
Amazon Website Search Bar
Amazon can be a great resource for finding replacement parts for your Hampton Bay patio heater. Most parts are available on Amazon at reasonable prices, and since most replacement parts are Universal and don’t need to be exactly for the Hampton Bay model, you won’t have to worry about finding the exact part.
Here are the steps to find replacement parts for your Hampton Bay patio heater on Amazon:
Go to Amazon and type “Hampton Bay Patio Heater Parts” into the search bar.
Narrow the results by checking off “Universal” in the right-hand side filter.
Read the listing and reviews to check compatibility with your Hampton Bay patio heater.
Contact sellers directly with any questions or concerns about compatibility.
Most buyers have reviewed that they brought Universal replacement parts and it worked fine with their Hampton Bay patio heater.
Purchase your desired replacement part from Amazon at a reasonable price.
Sears Parts Direct
Sears Parts Direct is a great place to find replacement parts for Hampton Bay patio heaters. It is an online site that can search millions of parts by model, part number, or brand.
Here are the steps to find replacement parts for your Hampton Bay patio heater on Sears Parts Direct:
Search for the part you want either via version wide variety or broadly, including "Hampton Bay Patio Heater".
Find your element and note its name and model wide variety.
Use the chat choice to ask if the component is well matched with your specific Hampton Bay heater model.
Alternatively, name 1-800-366-7278 to talk with a helpful consultant.
Hours of operation for Sears Parts Direct are:
Monday to Friday: 8:30 am–7:30 pm Central
Saturday: eight:30 am–7:30 pm Central
Sunday: nine:30 am–7:00 pm Central
The representatives at Sears Parts Direct are very knowledgeable and may be able to manual you in selecting the fine parts to your needs. They additionally provide beneficial guidelines in case you’re uncertain of the components you want. With Sears Parts Direct, finding alternative parts in your Hampton Bay patio heater has in no way been less complicated!
eBay Website Search Bar
eBay is a great place to look for replacement parts for your Hampton Bay patio heater. You can find almost any part you need at a reasonable price and the searchability of eBay makes it easy to shop for what you want.
Here are the steps to find replacement parts for your Hampton Bay patio heater on eBay:
Go to eBay and type “Hampton Bay Patio Heater Parts” into the search bar.
Filter the results for the specific brand, model, or part you need.
Read thru the object descriptions cautiously to ensure you are getting the exact part which you want.
Check the vendor’s comments rankings to get an idea of their customer service and save reliability.
Make certain to study all terms, conditions, and guidelines before shopping for.
Once you find the right part on your Hampton Bay patio heater, make certain to purchase it as soon as possible to keep away from missing out on a high-quality deal.
Craigslist: How To Find Your Patio Heater Parts
Craigslist is a extraordinary useful resource for locating substitute components for all forms of appliances, which include Hampton Bay patio warmers. The classifieds internet site permits users to submit objects they’re promoting, allowing customers to discover precisely what they need at a fee that works for them. Here’s how you may use Craigslist to locate the correct element in your Hampton Bay patio heater:
Visit Craigslist and search for "patio heater elements" on your nearby place. You can slender down the consequences by using adding a keyword like “Hampton Bay” to get extra unique outcomes.
Once you discover an object that looks like it would have the component you want, contact the vendor to ask if they have what you are seeking out.
Make sure you have got the version variety of your patio heater so that the seller can affirm if they have a well suited part.
When shopping for on line, make certain to ask questions and read all descriptions carefully before finishing your purchase.
What Hampton Bay Patio Heater elements will Home Depot update?
If you’ve got a Hampton Bay patio heater, you may be wondering what components Home Depot will replace. The answer is nearly any part! Home Depot is one of the most relied on names in domestic improvement, and they stand at the back of their products.
Here is a list of Hampton Bay parts that Home Depot will replace:
The base
The pole
The burner
The control panel
The wheels
The reflector
The regulator
The igniter
The pilot lights
The batteries
How to replace and install a Hampton Bay patio heater part?
If you have got a Hampton Bay patio heater, you know how crucial it’s miles to hold it in suitable working situation. Unfortunately, parts can put on out and wreck over time.
Replacement
If you need to update a part of your Hampton Bay patio heater, comply with these easy steps:
First, discover the version range of your patio heater. This may be determined at the again of the unit or on the bottom of the bottom.
Once you have the version range, go to the Hampton Bay internet site and discover the parts diagram to your model.
Next, become aware of the component you need to replace. Once you have got discovered the element, order it from the internet site or by way of calling customer service or locate it on-line at the Home Depot internet site.
Installation
Now that you have the substitute part, comply with those steps to put in it:
First, flip off the energy to the patio heater.
Next, take away the access panel and find the broken element.
Once you’ve got determined the broken element, cast off it and installation the brand new component.
Finally, reattach the access panel and turn on the electricity to the patio heater.
Now you recognize the way to replace and install a Hampton Bay patio heater part. Be sure to follow these steps whenever you need to perform renovation for your patio heater.
If you have any questions, be sure to name the Hampton Bay customer service line or visit the Home Depot website for more records.
Tips to assemble and use the Hampton Bay patio heater
If you’re seeking out a patio heater it is smooth to gather and use, the Hampton Bay patio heater is a superb alternative. Here are a few tips on the way to get the maximum from your Hampton Bay patio heater:
Make certain to read the commands carefully earlier than meeting. It’s crucial to comply with the commands correctly to be able to keep away from any harm to the heater or damage to yourself.
Once assembled, check the guide to discover ways to function the heater. It’s important to apprehend how the heater works before the usage of it.
When the usage of the heater, make certain to maintain a watch at the fuel level and refill whilst important.
It’s also critical to maintain the region across the heater clean of any flammable substances.
When you are completed using the heater, make certain to show it off and permit it to quiet down before storing it away.
By following these easy guidelines, you may be capable of get the most from your Hampton Bay patio heater and enjoy many warm nights to your patio. Thanks for studying!
The warranty and customer service for the Hampton Bay patio heater
Warranty
Hampton bay gives a one-yr constrained warranty on their patio heaters. This means that in case your Hampton Bay patio heater breaks in the first year, they’ll update it freed from fee. If it breaks after the first year, they’ll give you a prorated cut price on a brand new one. They additionally offer a 30-day cash-back guarantee in case you are not satisfied along with your buy.
Customer Service
In terms of customer support, Hampton Bay has a team of professionals to be had to reply your questions. You can attain them by means of telephone or e-mail, and they will be glad to help you with something trouble you are having.
Overall, the warranty and customer service for the Hampton Bay patio heater are exceptional. If you have got any problems with your purchase, you may make sure that they may be quick that will help you out.
Popular Hampton Bay Patio Heater Replacement Parts
Hampton Bay is thought for its wonderful and reliable patio heaters. Popular Hampton Bay patio heater models including the Pg171h-b, Nczh-g-ss, gsh-a-pc, and Nczh-g-kmzmss are all reliable and feature elements available for them. But earlier than you may begin looking for substitute parts, it is vital to recognize what sort of components you need. Here are some of the most common Hampton Bay patio heater substitute components:
Control Knobs Replacement
Control knobs are used to adjust the temperature, fuel, and airflow of your Hampton Bay patio heater. The manipulate knob is normally placed close to the burner and you can easily replace it with a brand new one if needed.
Ignition Switch Replacement
The ignition switch is what starts the flow of gas and starts the heating process. This is a crucial part and if your patio heater isn’t starting, you may need to replace the ignition switch.
Safety Shut-Off Valve Replacement
The safety shut-off valve controls the flow of gas through the system and it should be checked regularly to make sure it’s working properly. If it’s not working well, it can be dangerous and can lead to a hazardous situation.
Pilot Assembly Kit Replacement
The pilot assembly kit is responsible for creating the initial spark that ignites the gas in your Hmpton Bay patio heater. If your patio heater isn’t lighting up, you may need to replace the pilot assembly kit.
Gas Regulator and Hose Assembly Replacement
The gas regulator and hose assembly control the pressure of gas flowing through the system. It’s important to make sure this is in good working order at all times, as a faulty regulator can cause dangerous situations due to too much or too little fuel flow.
Thermocouple Replacement
The thermocouple is liable for sensing the presence of flame and controlling the float of fuel. If it’s not running properly, your patio heater won’t work as supposed. In this situation, you may want to discover the Hampton Bay Patio Heater Thermocouple Replacement part.
Reflector Bowl/Heat Diffuser Replacement
The reflector bowl or heat diffuser is responsible for directing the waft of warmth far from the burner and evenly distributing it at some point of your patio. If this component is damaged, you’ll want to get a replacement as a way to make sure that your patio is sufficiently heated up.
Burner Head Assembly Replacement
The burner head meeting offers gasoline to the burners, so if it’s no longer working properly, your patio heater gained’t be able to produce warmness. If you need to update the burner head meeting on your Hampton Bay Patio Heater, make certain you get the proper component for your version.
Ceramic Tile Set Replacement
The ceramic tile set is chargeable for protective the burners and providing insulation from outside temperatures. Over time and with put on and tear, this part may also want to get replaced.
Heat Shield Replacement
The warmness defend is a steel cowl that protects the burner and different components from immoderate heat. If your warmness guard is damaged, it’s a very good idea to update it a good way to keep your patio heater running properly.
Top Vent/Cap Assembly Replacement
The top vent or cap assembly allows air to circulate properly and prevents the buildup of dangerous levels of gas. This part should be checked regularly and replaced if it’s not working properly.
Mounting Frame with Wheels Replacement
The mounting frame and wheels are what make your Hampton Bay patio heater portable. If the frame is damaged, it’s important to replace it in order to keep your patio heater safe and secure.
Wiring Harness and Cables Replacement
The wiring harness and cables are responsible for connecting all of the components of your patio heater. If these parts are damaged, you won’t be able to control the flow of gas and heat. It’s important to replace them in order to get your Hampton Bay Patio Heater back up and running.
Hampton Bay Patio Heater Cover
Getting the proper cowl for your Hampton Bay patio heater will shield it from the elements and preserve it searching exquisite all yr round. There are loads of covers to be had on the market to healthy any model of patio heater, so that you’ll make sure to locate one which suits perfectly.
Here are some suggestions whilst looking for a cover:
Choose a cover that is climate-resistant and water-resistant to maintain your patio heater safe from the elements.
Look for one with UV protection to make sure it received’t fade in the sun.
Make positive the quilt has adjustable straps and drawstrings so that you can customise it to the size of your heater.
Check for ventilation holes to prevent condensation within the cowl.
Look for a cowl with a storage bag or zipper so you can effortlessly keep it when now not in use.
Hampton Bay Table Top Heater
The Hampton Bay Table Top Heater is the right solution for including warm temperature to any outside gathering. This fuel-powered heater has a warmth output of 11000 British Thermal Units and might cover as much as 175 square feet of space, making it perfect for patios, decks, and other outdoor settings. The bronze powder-coated finish provides a sleek, current appearance to any outside decor. With its lightweight design, this heater is simple to move around and may be stored in a small space when no longer in use. The adjustable flame allows you to customize the amount of heat you need whilst the built-in safety functions provide peace of mind.
The following are some of the capabilities of the Hampton Bay Table Top Heater:
Heat output of 11000 British Thermal Units
Covers up to 175 square feet of space
Bronze powder coating for a modern look
Lightweight design with adjustable flame
Built-in safety features for added peace of mind
Easy to move and store when, not in use
Easy to assemble with parts included
CSA certified for safety and reliability.
Hampton Bay Pyramid Patio Heater
The Hampton Bay Pyramid Patio Heater is the best way to increase your outdoor season. This powerful patio heater is manufactured from high-grade chrome steel and is designed with a swish pyramid form. It has an excellent heat output of 42,000 BTUs and can cowl up to 10 m of space. The built-in protection functions encompass an anti-tilt transfer and a flame failure tool for introduced protection.
The adjustable warmth manage lets in you to customize the temperature at the same time as the integrated wheels make it smooth to transport round your patio or deck. This Pyramid Patio Heater makes use of propane, butane, or LPG fuel resources and has bundle dimensions of fifty four.5 x 30 x 7.5 inches and a total weight of sixty nine.9 pounds. It is CSA certified for protection and reliability and has an object model quantity of GSH-A-PC. Get the most out of your patio or deck with the Hampton Bay Pyramid Patio Heater!
Some of the notable features of this Pyramid Patio Heater include:
Heat output of 42,000 BTUs
Can cover up to 10 m of space
Built-in safety features such as an anti-tilt switch and flame failure device
Adjustable heat control for customizable temperature
Built-in wheels for easy movement
Uses propane, butane, or LPG fuel sources
Package dimensions of 54.5 x 30 x 7.5 inches
Total weight of 69.9 pounds
CSA certified for safety and reliability
Item model number GSH-A-PC
FAQs
Q: Why does my patio heater keep going out?
A: If your patio heater keeps going out, it is most likely due to a problem with the igniter. The igniter is responsible for creating the spark that lights the patio heater’s burner. If the igniter is defective, it will not create a spark and the patio heater will not stay lit.
Q: How can I troubleshoot my patio heater’s igniter?
A: To troubleshoot your patio heater’s igniter, first make certain that it’s miles well established and that the battery is good. If the igniter still does now not create a spark, it is able to be faulty and could want to get replaced.
Q: What is the first-rate manner to clean my patio heater?
A: The pleasant way to clean your patio heater is to use a slight cleaning soap and water solution. Do now not use harsh chemical substances or abrasives, as this could damage the finish of your patio heater. Once you have got cleaned the outdoors of your patio heater, make sure to dry it completely before the usage of it once more.
Q: How frequently ought to I update the propane tank for my patio heater?
A: The frequency with which you need to update the propane tank to your patio heater will depend upon how frequently you use it. On average, a propane tank will last for approximately 20 hours of use. If you operate your patio heater frequently, you could need to replace the propane tank extra regularly.
Q: Can I go away my patio heater out of doors inside the winter?
A: Yes, you may depart your patio heater outside in the wintry weather. However, you should take steps to guard it from the elements. If viable, shop your patio heater in a shed or storage. If you ought to depart it outside, cover it with a tarp to defend it from the snow and ice.
Q: What should I do if my patio heater starts to rust?
A: If your patio heater starts to rust, you should immediately remove any rust that has formed. Once you have removed the rust, apply a rust-resistant primer and paint to the affected area. This will help to prevent the rust from spreading and will also make your patio heater look new again
Q: I by chance dropped my patio heater and the glass broke. Can it be replaced?
A: Yes, the glass for your patio heater can be replaced. However, you’ll need to buy a alternative glass panel from the manufacturer. Once you have the substitute glass, follow the commands that got here with it to install it. If you have got any questions, you could usually contact the producer for assistance.
Q: I suppose there is a trouble with my patio heater’s burner. What should I do?
A: If you observed there may be a trouble along with your patio heater’s burner, you need to touch the manufacturer. They may be able to troubleshoot the hassle and decide if a substitute component is important. In a few cases, they will be capable of provide you with a substitute component at no cost.
Q: Where can I locate alternative elements for my patio heater?
A: Replacement components for your patio heater can be located at most hardware shops. However, it’s miles constantly satisfactory to buy replacement elements on on line websites which include Home Depot, Amazon, Craiglist, eBay, Walmart, and so on. This way, you could ensure that you are becoming the suitable component to your version patio heater.
Q: How do I know if my patio heater is still underneath warranty?
A: To find out if your patio heater remains underneath warranty, you will need to touch the manufacturer. They might be in a position to inform you ways long the warranty is for and what’s covered. In maximum instances, the patio warmers have a one-year warranty. However, some producers may additionally provide an extended assurance period.
If you are in need of alternative components to your Hampton Bay patio fixtures, you’re in good fortune. This article will provide you with a few clean steps to help you discover the alternative components that you need. Keep in mind that not all parts may be to be had, but maximum may be found quite effortlessly. So, without in addition ado, let’s get began!
What are Hampton Bay patio fixtures?
Patio furniture is furniture specifically designed for outdoor use. It is usually constructed of weather resistant materials such as aluminum, stainless steel, wrought iron or wicker.
Hampton Bay is a emblem of patio furnishings bought with the aid of The Home Depot. Hampton Bay patio fixtures is made from weather-resistant substances, which include aluminum, steel, wicker, and plastic.
The Hampton Bay gives a wide type of patio fixtures, consisting of chairs, tables, chaises, umbrellas, and cushions. Hampton Bay also sells replacement components for its patio fixtures.
Hampton Bay patio fixtures is a famous desire for plenty owners due to the fact it’s far long lasting, elegant, and easy to care for.
If you’re searching out weather-resistant patio furniture so that it will last for years, Hampton Bay is a wonderful alternative. You can find Hampton Bay furnishings at most Home Depot stores.
Is Hampton Bay Furniture for the Patio Good?
If you are seeking out first-rate fixtures in your patio, you may be questioning if Hampton Bay is a great choice. Hampton Bay is a popular emblem that offers a extensive variety of out of doors fixtures, consisting of patio furnishings.
So, is Hampton Bay Furniture for the Patio Good?
The brief solution is sure, Hampton Bay Furniture is simply appropriate for the patio! The furniture is crafted from brilliant substances and is constructed to final. Plus, the furnishings is stylish and to be had in plenty of designs, so you’re positive to find some thing that suits your taste.
You can locate the appropriate Hampton Bay patio furnishings on your fashion and wishes, whether or not you’re searching out a small bistro set or something large for interesting.
If you’re looking for pinnacle-notch patio fixtures, Hampton Bay is sincerely a emblem to keep in mind!
Which patio fixtures does Hampton bay offers?
If you’re searching out elegant and low-cost patio furniture, Hampton Bay has a wonderful choice to pick out from.
Here is a list of some of the patio furniture that Hampton Bay offers:
Outdoor Sofas
Loveseats
Chaises
Sectionals
Dining Sets
Bistro Sets
Bar Stools
Chairs
Ottomans
Benches
Hammocks
Swings
Whether you’re looking for a eating set, a verbal exchange set, or just a few chairs, you will discover what you are seeking out at Hampton Bay. Plus, with a whole lot of shades and patterns to pick from, you are sure to locate patio furnishings that fits your private style. So take a look at what Hampton Bay has to provide and begin taking part in your outside area today!
What are the features of Hampton bay patio fixtures?
Hampton Bay patio fixtures has many features that make it a fantastic desire for all of us searching out satisfactory outside fixtures. Here is a quick rundown:
High-first-class substances
Hampton Bay patio furnishings is made from splendid substances which can be constructed to final. The frames are crafted from long lasting aluminum and the cushions are made from UV Resistant, Rust Resistant, Weather Resistant, And Water Resistant fabric.
Stylish designs
Hampton Bay patio fixtures is available in quite a few elegant and elegant designs in an effort to supplement any outside area. From traditional to contemporary, there is a style to fit every person’s taste.
Comfortable
Hampton Bay patio furnishings is designed for comfort. The cushions are thick and lush, and the chairs are ergonomically designed to provide support in your back and neck.
Affordable
Hampton Bay patio fixtures is very lower priced. You can locate units for a fragment of the fee of different manufacturers.
Easy to care for
Hampton Bay patio furnishings is very easy to care for. The cushions are device cleanable and the frames may be wiped down with a moist cloth.
Easy to bring together
Hampton Bay patio furnishings is very smooth to gather. Most sets come with smooth-to-follow instructions and all of the important equipment.
Hampton Bay patio furniture is a outstanding preference for anybody searching out pleasant out of doors fixtures. The splendid materials and stylish designs make it a wise funding, and the comfort and affordability are an brought bonus.
What Are The Benefits of choosing Hampton Bay patio furniture?
If you are seeking out top-exceptional patio furnishings a good way to final for years, then you should certainly remember Hampton Bay. Here are only a few of the benefits of selecting this logo:
Durability: Hampton Bay fixtures is built to remaining, way to its amazing materials and creation.
Style: Hampton Bay offers a huge range of styles to select from, so you’re sure to discover some thing that fits your flavor.
Value: You’ll get notable value in your money with Hampton Bay furniture, as it’s very moderately priced.
Warranty: Hampton Bay furnishings comes with a warranty, so that you can be assured that it’ll last for years to come.
Customer carrier: Hampton Bay has first rate customer support, so you can be positive that any issues could be fast resolved.
If you’re seeking out pinnacle-best patio furnishings, then Hampton Bay is actually the manner to go. You’ll get extremely good value to your cash, and you may be confident that your furnishings will ultimate for years to come.
What is the Hampton Bay Patio Furniture Collection?
Hampton Bay, like other patio furnishings companies, manufactures dining tables, chaise lounges, serving carts, umbrellas, bistro sets, swings, outdoor loveseats, and gliders.
With each collection, there are a variety of patio furniture pieces to choose from that coordinate well.
For example, the Verrado set is perfect if you’re looking for oversized furnishings. This line comes with extra-large seating and beautiful jacquard woven cushions for optimum comfort levels.
On the other hand, Hampton Bay’s Calabria line might be more your speed if you desire lightweight chairs that are easy to move around and store—they’re also stackable!
List of Hampton bay collections:
Folian: “Timeless Expression”
The Folian line is a beautiful collection, with intricate design patterns and retro aesthetics. One of the best features of this line is that you can buy a loveseat glider and an outdoor swing.
Calabria: “Stackable Sling Furnishings”
These chairs offer a versatile seating experience, as they can be stacked and slung. The seat backs are adjustable so you can lounge however you’d like. Plus, the frames are treated with rust-resistant powder coating.
Dana Point: “Durable Sling”
The Dana Point collection of slings has rust-free aluminum frames and is weather resistant. (Calabria & Simone collections are also sling-friendly). Round tempered glass was used to create the dining table, which is scratch resistant. A single chaise lounger and a double scrounge chair are included in this collection.
Venice: “Firepit Table”
The Venice (Cabrera, too) collection comes with a great wood-burning firepit table. The firepit has an insert that creates a flat table top when the pit is not in use. 4 large sling chairs are included for your comfort.
Tobago: “Mediterranean Style”
The Tobago collection includes 7-piece dining set with 6 chairs and a table with a faux wood grain finish. The table top is cast tile, and the seat cushion fabric is Marquesa. The true framing is aluminum. Other pieces in the collection include a 9ft umbrella and a 6piece sectional set.
Cabrera: “Firepit Table”
This set gives you the chance to sit around an outdoor fire with friends, relatives, or by yourself. You can use the table for dining or relaxation and simply enjoy the warmth of the fire. The 5-piece set includes 4 chairs and a table; other pieces in this collection are a wine rack, serving cart, and umbrella.
Teak “Teak wood is the best wood for outdoor furniture”
The Amazon Teak collection includes a 7-piece dining set, 9′ outdoor umbrella, and 7-piece deep seating.
Simone: “Luxurious Sling Collection”
The Simone collection, like Calabria, also manufactures sling furnishings. However, this line provides more luxury and comfort overall.
Sydney: “Plush cushion comfort”
The Sydney collection is a sophisticated yet classic design. The soft cushions provide great comfort. The line also includes tinted glass tabletops, which are distinctive to it.
Verrado: “Oversized pieces”
The Verrado has a nice collection. Pieces are made to be big and wide for added comfort and breadth of motion.
Kampar: “Resin wicker”
The Kampar furniture collection is attractive and made of weather-resistant woven resin wicker. It includes:
3-piece woven bistro set
Serving cart
Chaise lounge
9ft umbrella
Woven day bed
Piece dining set
Benedetto’s “Tuscan Warmth”
The Benedetto collection has pieces for a stylish and classic taste. The collection contains:
Double chaise lounge
Plant Stand
Separate firepit
Dining sets
Chat sets
Melbourne: “Resin Wicker”
The Melbourne line of woven resin wicker furniture includes a 6-piece woven chat set.
How do I care for my Hampton Bay patio furniture?
Caring for your cherished Hampton Bay patio furniture is akin to nurturing a work of art. It requires dedication, attention to detail, and a comprehensive understanding of the materials at play. Depending on the type of patio furniture gracing your outdoor oasis, the care instructions may vary significantly, as wicker patio furniture calls for a different approach than its aluminum counterpart. So, let’s embark on a detailed journey through the nuances of caring for your Hampton Bay patio furniture:
The Elegance of Immaculate Furniture
At the forefront of preserving your patio furniture’s allure is an unwavering commitment to cleanliness. A routine that includes the gentle wiping down of your furniture’s surfaces with a soft cloth takes center stage. This diligent act rids your furniture of the ever-accumulating dirt, dust, and pollen that can tarnish its beauty over time. But what about those formidable stains? Worry not, for a mild soap and water solution steps in as your trusty ally. However, remember to shower your furniture with a thorough rinse post-cleansing, ensuring the eradication of any lingering soap residues.
Battling the Elements
Shielding your patio furniture from the capricious whims of Mother Nature is your next critical endeavor. If your dwelling resides in an area that experiences an excess of sunlight, gusty winds, or relentless rain, it’s paramount to implement defensive measures. To fortify your furniture’s resilience against the elements, consider the application of a protective coat of polyurethane or varnish. But that’s not the whole story; during periods of furniture inactivity, embrace the protective embrace of a furniture cover or tarp. These thoughtful layers of protection significantly extend your furniture’s lifespan.
Hibernate with Care
As the seasons shift and the weather takes a cooler turn, your patio furniture, too, seeks a respite. Storing it in a cool, dry sanctuary is your insurance policy against rust and damage. Ideally, a spacious garage or shed plays host to your beloved pieces. But what if space is a luxury? Fret not! Swaddle your furniture tenderly in a secure tarp and nestle it within your basement or any other suitable storage haven.
The Art of Preservation: Sealants and Stains
To further fortify the resilience of your patio furniture and keep it looking as resplendent as the day it joined your outdoor retreat, consider anointing it with a sealant or stain every few years. These magical elixirs erect an impenetrable barrier against the elements, thereby safeguarding your furniture’s youthfulness. Most home improvement stores house these rejuvenating potions, ensuring the longevity of your outdoor haven.
Rain Defense: Drying Off Gracefully
Even with the most meticulous care, your patio furniture may occasionally engage in an unwanted tango with rain. In such moments, time is of the essence. Swift action is imperative to avert the peril of water damage. Armed with a gentle cloth, embark on an exhaustive mission to caress your furniture back to dryness. Allow it to bask in the embrace of airy shade for a thorough, unhurried air drying process.
Cleansing Rituals
When the time comes for a comprehensive cleansing of your patio furniture, err on the side of caution. The use of abrasive chemicals is akin to an assault on your furniture’s finish, leading to premature fading or discoloration. Instead, adhere to the gentle embrace of mild soap and water solutions or opt for a tender, all-purpose cleaner. This practice guarantees the sustained splendor of your cherished outdoor companions.
Vigilance for Longevity
Never underestimate the power of meticulous inspection. Regularly, embark on a visual journey through your patio furniture, scrutinizing for telltale signs of wear and tear. Loose screws, bolts, or joints can be early harbingers of impending trouble. Swiftly addressing these minor concerns helps forestall more significant issues down the line. If any damage is unearthed, prompt repairs are essential to prevent further deterioration.
Embarking on the Quest for Hampton Bay Patio Furniture
Now that you’re armed with the knowledge of nurturing your Hampton Bay patio furniture, you might wonder where to embark on the quest to acquire this coveted brand. Look no further, for Hampton Bay patio furniture graces the shelves of various esteemed retailers, both physical and virtual. Here’s a curated list of well-known destinations:
Home Depot
Lowe’s
Walmart
Target
Amazon
Wayfair
Overstock
Sears
Kmart
JCPenney
These retailers serve as your gateway to an extensive array of Hampton Bay patio furniture options, promising to provide the perfect set to complement your outdoor sanctuary. Happy hunting!
Breathing Life Back into Covers, Cushions, and Fabric
As the seasons unfurl their tales, your Hampton Bay patio furniture covers, cushions, and fabric may begin to display the scars of time and use. But fret not; you hold the power to breathe new life into these weathered companions with the following strategies:
1. Pursue Excellence in Replacement Materials
Commence your rejuvenation odyssey by seeking out high-quality replacement covers, cushions, or fabric. Investing in top-tier materials is your gateway to ensuring that your patio furniture remains a dazzling centerpiece in your outdoor tableau.
2. The Symphony of Consistent Cleaning
Maintaining your covers, cushions, and fabric’s pristine state begins with a symphony of consistent cleaning. Regular maintenance rids your beloved accessories of the dirt and debris that can contribute to wear and tear over time.
3. The Shield of Protection
Embrace the shield of protection by applying a specially formulated protectant to your covers, cushions, and fabric. This invisible guardian forms an impenetrable barrier against water and stains, preserving the pristine appearance of your patio furniture.
4. Timely Replacements: Reviving the Old
Should your covers, cushions, or fabric bear the brunt of extensive damage, do not procrastinate—opt for replacements. This proactive approach ensures that your patio furniture maintains its youthful vigor and alluring charm.
The Age-Old Dilemma: Repair or Replace?
When your cherished Hampton Bay patio furniture displays signs of wear and tear, you stand at a crossroads of decisions—should you repair or replace? Each path comes with its own set of merits and demerits:
Repairing
The Allure of Restoration
Pros:
Cost-effective if your furniture retains overall good condition.
Breathes new life into your set with minimal investment.
Allows customization with fresh cushions or a touch of paint.
Cons:
Time-consuming and may require research for replacement parts.
Not ideal for extensively aged or significantly damaged furniture.
Buying New
Pros:
The opportunity to select a new style and design to revamp your outdoor space.
Suitable for severely damaged or aged furniture.
Minimal effort, as new furniture arrives in pristine condition.
Cons:
Potentially higher cost than repairs, depending on your selection.
Challenges matching the exact style of your old set.
The choice between repair and replacement hinges on various factors, including your budget, emotional attachment to the old set, and the extent of wear and tear. Assess your unique circumstances to make an informed decision that aligns with your vision for your outdoor sanctuary.
The Quest for Replacement Parts and Repairs
Should you find yourself in need of replacement parts or repairs for your Hampton Bay patio furniture, fret not. Here’s your comprehensive guide to navigating this intricate journey:
Contact Home Depot: Dial 1-877-527-0313 and keep your UPC#, model number, or SKU# handy.
Opt for Option #2: In the dropdown menu, select Option #2 for Hampton Bay.
Choose the Product Category: Designate your specific product category, such as “Patio.”
Explore Your Options: Delve into the possibilities:
Option #1: If you possess the UPC# or Model # and purchased your set within the last 2 years.
Option #2: For those without the UPC# or Model number but bought the set within two years.
Option #3: When neither the required numbers nor a recent purchase applies, consider taking a photo for identification.
You can typically locate your UPC number or model number on a silver sticker beneath your chair or on cushion labels. Hampton Bay provides replacement parts for various components, from arms to legs, contingent on your chair type.
For additional resources, Chaircarepatio.com emerges as a recommended haven by Home Depot, specializing not only in chair repairs but also cushions and fabrics.
Where to Locate Hampton Bay Patio Furniture Replacement Parts
Embarking on the quest for replacement parts for your Hampton Bay patio furniture takes you on a multifaceted journey:
Local Retailers: Hardware stores, home improvement outlets, and even department stores often stock Hampton Bay patio furniture replacement parts.
Online Retailers: The digital realm offers a treasure trove of options, with websites like Amazon, Home Depot, Walmart, Lowe’s, and eBay boasting an extensive selection of replacement parts to cater to your needs.
Official Hampton Bay: The Hampton Bay website serves as a valuable resource for pinpointing specific replacement parts. However, ensure you have the model number on hand for precise results.
Should uncertainty cloud your path concerning which parts require replacement, don’t hesitate to reach out to Hampton Bay customer service for expert guidance.
Common Problems and Identifying Replacement Needs
To unveil the specific parts in need of replacement for your Hampton Bay patio furniture, embark on an insightful journey of identification, decoding common issues:
1. Rust and Deterioration: Vigilantly scan for any hints of rust on metal components; it often conceals deeper damage. Fading or chipped paint may also veil lurking rust concerns.
2. Cushion and Fabric Damage: Scrutinize your cushions and fabric for telltale signs of wear and tear. Faded hues, tears, or moldy appearances beckon the need for replacement to resurrect both comfort and aesthetics.
3. Loose or Missing Fasteners: Meticulously look into screws, rivets, and bolts anchoring your furniture. Any looseness or absence demands fast substitute to assure balance and safety.
3. Frame Integrity: Conduct a holistic assessment of the body’s circumstance. Bent or fractured frames function pink flags, heralding the need of substitute to keep structural integrity. By adeptly identifying these issues, you reap the prowess to precisely pinpoint which particular elements require alternative.
In doing so, you ensure your Hampton Bay patio furniture keeps each its capability and charming appeal, transforming your outside haven right into a sanctuary of timeless elegance. This complete manual delves into the intricacies of caring for, renewing, and probably changing the one you love Hampton Bay patio furnishings. Armed with expertise, you may protect your outdoor haven’s splendor and software for decades to come back. So, assignment forth, embody the art of patio fixtures care, and let your outside sanctuary shine with undying attraction.
What are the advantages of ordering substitute parts without delay from the manufacturer?
There are several blessings of ordering substitute parts directly from the producer.
Here are some key blessings:
You’re guaranteed to get the proper element for your unique product. When you order from the manufacturer, they’ll have a record of your product and can make sure which you get the right replacement piece.
You’ll likely get a guarantee on the element. Many producers provide a guarantee on their substitute parts, so if some thing is going incorrect, you’re included.
The component will possibly deliver quicker. When you order from the manufacturer, the component will come immediately from them and won’t should undergo a third-party retailer. This can speed up the method significantly.
You may be able to get a discount. Some manufacturers offer a reduction while you order at once from them, so it’s worth checking to look if this is an alternative.
Overall, there are numerous benefits to ordering substitute parts immediately from the manufacturer.
How do properly degree your furnishings earlier than ordering replacement elements?
When ordering replacement parts to your fixtures, it’s far essential to take proper measurements. Otherwise, you may grow to be with elements which can be the incorrect size, and this can be frustrating and pricey.
Here is a step-via-step manual on a way to take the right measurements:
First, you’ll need to measure the width of the furniture piece. To do that, degree from the widest factor of the piece to the alternative widest point.
Next, degree the fixtures piece’s top. To do that, measure from the best factor of the piece to the lowest factor.
Finally, degree the furnishings piece’s intensity. To do this, measure from the the front of the piece to the again.
Once you have those measurements, you could order your replacement elements with self assurance, understanding that they will fit your furniture well.
Measuring your furnishings before ordering substitute elements is a simple however crucial step inside the system. By taking the time to do it, you could keep away from frustration and wasted money.
Tips for assembling new alternative components efficiently
Make sure you have all the important components.
Follow the instructions cautiously.
Take it slow and do not rush the process.
If you’re now not certain about something, ask for assist.
Check that each one the parts are well aligned and secured earlier than shifting directly to the following step.
Double-check your work before you finalize the assembly.
FAQs
Q: What are the most common Hampton Bay patio furniture replacement parts?
A: The most common Hampton Bay patio furniture replacement parts include cushions, slings, and end caps.
Q: Does Hampton Bay have a website?
A: The Hampton Bay Company is a popular brand of home goods. The company offers only online and at Home Depot stores throughout the United States. You may contact the Hampton Bay Company through their customer care hotline of +855-HD-Hampton.
Q: Is Hampton Bay a good brand?
A: Hampton Bay ceiling fans are not as high-end as other brands, but they are often of superior quality to their cheapest budget models. Check out our Hampton Bay vs. Hunter ceiling fan brand comparison to see how Hampton Bay compares to more expensive names like Hunter.
Q: Where can I get the best deal on patio furniture?
A: You Can Get the Best Patio Furniture Deals at Amazon and Walmart. The Mainstays Sand Dune Outdoor Chaise Lounge Set is one of the best bets for your money. The Costway 4 Piece Rattan Furniture Set is also a great choice if you’re looking for something durable and versatile
Q: What is the best time to buy patio furniture?
A: The best time to buy outdoor furniture according to some is in May, just before Summer starts. However, others argue that the August-September period is when you should get furniture for your porch and deck.
Q: What should I look for in wicker patio furniture?
A: Begin by considering how you want your outdoor space to be utilized. Take a seat before you make a decision. Consider Easy Care. Consider Storage When Choosing One. Invest in High-Quality Items. Examine the Ground for Pests and Rocks. Search for Functionality in Dual-Purpose Furniture.
Q: When should I buy patio furniture for sale?
A: From August to October, you’ll find the best deals on patio furniture as stores make room for fall inventory. Normally, the closer it gets to summer, the higher the savings. For example, in early August most items are 20% off.
Q: What kind of patio furniture is most durable?
A: Teak is the most common wood type used for outdoor furniture, but synthetic resin is also a great modern choice because it doesn’t require much upkeep, is lightweight, and can withstand any weather
Q: How much should I spend on patio furniture?
A: Generally speakme, nice cushioned chairs will fee between $800 and $2,000. Quality sofas will price $1,800 to $3,000. Look for eating tables among $900 and $2,000 or greater. These can range pretty a bit primarily based on layout and length.
Q: Is aluminum or steel better for patio furniture?
A: Patio furnishings constructed of aluminum is simple to provide. Aluminum additionally has a decrease melting point than metal or iron, so the methods worried in its manufacturing are less energy-extensive than those required for ferrous metals. Aluminum may be extruded or solid into any form or form.
Q: Why is patio furniture so expensive?
A: Because outdoor plastic furniture is designed to resist UV radiation and color fading with time, it is generally more expensive. This typically has to do with the method in which the plastic is created and molded. Outdoor chair cushions are more costly for a few reasons.
Q: Is it OK to go away patio fixtures out within the rain?
A: Sunbrella fabrics are best for outdoor use as they are resistant to moisture, mould, and fading. This way that if you depart your cushions uncovered in the course of a rainstorm, the water will bead up and roll off. If your cushions do get moist within the rain, make certain to Shake or wipe off any excess water and allow them to air out afterward.
Q: Can you leave metal patio furniture outside in the winter?
A: When it comes to metal or aluminum patio furniture, it’s critical to bring them inside during the winter. The snow and ice rain can cause rust on these items, which might damage the material.
People often choose the wrong ceiling fan for their rooms, resulting in unnecessary problems in the future. Firstly, one must not compromise the quality of the fan they are purchasing. Good quality fans lead to minimum problems later on. When purchasing a ceiling fan for your room, buy one compatible with your room’s size. The larger the room, the more air circulation fans are required. If a low-power fan is installed in a large room, it won’t be effective enough to cool the entire room.
In this case, the Hampton Bay Caswyck Ceiling Fan is a very good choice. Caswyck is a 54-inch vintage look ceiling fan that comes with a cherry wood finish, providing a sleek and stylish design. It includes five reversible blades. Now why is it an ideal choice, specifically for larger rooms? We will take a look at it further in this blog.
Key features of the Caswyck Ceiling Fan
54-inch blade span
190W limiter for energy savings
Vintage, sleek cherrywood finish
Integrated up and downlight with Venetian scavo glass
Reversible blades in cherry and pitted cherry finish
Lifetime motor warranty
Dual Mount Installed
Three-speed hand-held remote control
Performance
The Hampton Bay Caswyck Ceiling fan is known for its performance and adds up to its plus points. The fan comes with a detailed user manual which includes all the installation instructions, safety instructions, and important safety warnings, making it an easy-to-install fan. The high-power fan with its five reversible blades is enough to provide good powerful airflow. Also, its operation is not noisy, and the Caswyck is a quiet operation fan.
Click on the link above to the User Manual and get the detailed step-by-step installation guide for the Caswyck Ceiling Fan and the safety instructions.
Maintenance, cleaning, and troubleshooting recommendations
Make sure the fan is working correctly and not producing any unusual noises. If so, give a quick examination; the fan blades might be needed to be repaired or replaced.
Many times, when the fans are regularly used, the screws of the blades get loose, so they may need to be tightened up using a screwdriver. This may fix the unusual noise issue.
Also, clean the mount as well as the fan blades on a regular basis. Use a vacuum to remove any accumulated dust, and you may also use a damp cloth to wipe off any stuck dirt from the fan blades.
Proper care and maintenance of the fans would surely increase their lifespan.
Conclusion
Now think no more! Hampton Bay’s Caswyck Ceiling Fans are the ideal choice for large spaces with many advantages, including the five reversible blades and the dual mount. They are also ideal because of their energy-saving ability and quiet operation, causing no disturbance. Install them in a large school library or a classroom; they will provide good air circulation and no noise disturbance. In rooms at home with a large covered area, you won’t need to install two fans as this one powerful airflow fan would be enough. It’s surely the right choice!
Are you building a new house or moving into a new place and can’t decide where to get yourselves a good bathroom and kitchen cabinetry? Look no further because Hampton Bay cabinets are the right choice for you. Over time, however, Hampton Bay has faced some curiosity from its buyers regarding the manufacture. This has potentially led to people being skeptical about their products. Rumor has it that Hampton Bay doesn’t manufacture furniture under its name. Home Depot takes the credit for manufacturing the furniture for them. Hampton Bay only takes by the name.
In the article, we are going to uncover the truth behind this controversy and learn more about the quality and history of Hampton Bay Cabinets. Read on to find out more:
Who makes Hampton Bay cabinets?
History and Background
Hampton Bay, a renowned brand specializing in kitchen and bathroom cabinets, was established in the late 1990s. The brand was said to sell its products through a store called Home Depot, located in Canada and the United States. The brand gets its popularity and recognition from producing minimalistic, aesthetic, durable, and, most importantly, affordable kitchen and bathroom cabinets. This brand’s production of quality products led to it being among the top-selling brands for bathroom and kitchen cabinets.
The truth about Hampton Bay cabinets is that Hampton Bay doesn’t manufacture their materials, or their furniture themselves is unknown. It is stated that the actual manufacturers behind Hampton Bay’s cabinets could be either Home Depot or Hampton Bay themselves. It’s just that the truth is yet to be unleashed. Most of the products of Hampton Bay are sold at Home Depot. This could mean that Home Depot themselves are the manufacturers, but they are just using the name of Hampton Bay to get their sales. Not only this, but other companies, such as Woodcrafters, Sunjoy, Fedders Corporation, etc., have also been known to manufacture Hampton Bay’s products. The mystery remains unsolved.
Ownership and Parent Company of Hampton Bay cabinets
If we talk about the ownership and the parent company of Hampton Bay cabinets, then the answer is American Woodmark Corporation. American Woodmark Corporation has its name in the industry. They are considered to be amongst the greatest manufacturers and distributors of kitchen and bathroom cabinetry. Hampton Bay lies under the ownership of American Woodmark Corporation. Due to the leading success of the corporation, customers are provided with quality products from Hampton Bay to create and build unique structures for their kitchen and bathroom cabinetry. Not only this, but American Woodmark Corporation also takes charge and ownership of various other brands such as Timberlake, Waypoint Living Spaces, and PCS (Professional Cabinet Solutions.) Due to their unique designs and styles, people prefer buying furniture, most commonly from brands under the ownership of American Woodmark Corporation.
Where are Hampton Bay cabinets made?
Hampton Bay products are made in various states in America as well as outside of America. The owner and parent company American Woodmark Corporation has its own manufacturing houses located at multiple locations.
a. Global Manufacturing Facilities
Suppose we are to talk about the global manufacturing facilities of Hampton Bay. In that case, they get their products manufactured in warehouses across America in states like California, Florida, and Texas, and outside of Europe, in Asia. These manufacturing facilities allow the production of quality materials which is used in the making of the cabinets.
b. Domestic Manufacturing Operations
Domestic manufacturing operations of Hampton Bay are observed mostly in China; the proof of this is listed or crafted on the furniture itself. Apart from this, there are other manufacturing facilities under the owner company of Hampton Bay American Woodmark Corporation, which are widespread across America in states like Kentucky, Virginia, and Arizona. The reason why Hampton Bay supports Domestic Manufacturing operations is to help other economies and ensure the quality of production as well as the distribution of products.
What is the quality of Hampton Bay cabinets?
Hampton Bay has made its name because its products are of the best quality and most durable. Hampton Bay does not compromise on its product quality and produces a piece that is durable and worth the buy.
a. Materials and Construction of Hampton Bay cabinets
As stated before, the quality of Hampton Bay products is not compromised. This means that the best materials are used in production and manufacturing. Hampton Bay cabinets are made of wood that is primarily of the solid type. This includes using oak wood, solid wood, maple wood, etc. All these types of wood are good at withstanding pressure and are very aesthetic. These are commonly utilized as door frames or for openings in cabinets. Apart from this, to keep things inexpensive and affordable, Hampton Bay uses medium-density fiberboard (MDF) or particleboard, a type of wood, to construct its shelves and wood panels. The cabinet’s materials are constructed and fixed uniquely to ensure the cabinets’ durability and long-lastingness for your kitchen or bathroom.
b. Customer Reviews and Satisfaction
Customer reviews and satisfaction are the most crucial elements for a business or company. If questions are being raised about the quality of the products, the company can turn them down. Although Hampton Bay is known for its quality kitchen and bathroom cabinetry, there are still some people who seem to be unsatisfied by the products of it. An example is that people have often been seen to be complaining about the wood that Hampton Bay uses.
Hampton Bay uses particleboard, a type of wood that is somewhat cheap and not very durable. The use of such types of wood makes customers reconsider their choices, especially people who look forward to not renovating or changing their cabinets often. Although it makes the cost of the cabinets less pricey, it still interferes with the quality and durability of the product. Another frequent complaint is that the wood is prone to heat and water damage. If wood is exposed to heat or moisture for too long, it begins to swell. Nevertheless, the majority believes in Hampton Bay’s cabinetry which is their top priority when buying cabinets.
Are Hampton Bay cabinets a good value?
a. Price Range and Affordability
Hampton Bay cabinets are known for their affordability. They are known to be readily available and less expensive. The best part is they do this without compromising the quality of its products. The prices of Hampton Bay cabinets can vary depending on various factors. These factors can be style, shape, size, color, etc. Apart from this, Hampton Bay also gives you the freedom to customize your kitchen and bathroom cabinets. Customization will allow you to design your cabinetry the way you want to, according to your preferences. Doing so, then, will cost you more.
b. Comparison with Competing Brands
If we compare Hampton Bay with other competing brands, several points, and factors make Hampton Bay a better alternative. The reasons for this are stated below:
●Quality
Hampton Bay uses wood and other materials for its cabinet production, which is mostly durable and long-lasting. The shelves and cabinet materials also don’t get compromised and are assembled using unique techniques to ensure they remain intact. Other brands may offer you cheaper cabinets; however, they won’t be as durable as Hampton Bay’s cabinets.
●Affordability
The best part about buying cabinets from Hampton Bay is that they are affordable and reasonably priced. They are worth the price. Hampton Bay doesn’t provide products that are not valuable to its customers. Brands apart from Hampton Bay may offer cabinets of the same materials used but at a higher rate making them less economical. Therefore, Hampton Bay cabinets are the best option for budget-minded homeowners.
●Styles
Hampton Bay offers cabinets of various styles, colors, shapes, and sizes. So Hampton Bay should be your priority if you’re looking for a basic, fancy, minimalistic, or aesthetic design for your cabinets. They produce cabinets with the best finishing, eliminating a rough and bland look. Apart from this, you can customize your cabinets according to your liking or kitchen and bathroom styles. Other brands may offer some suitable styles, but they might lack finishing and might not be quality guaranteed.
Conclusion:
Hampton Bay is a brand under the ownership of American Woodmark Corporation. The manufacturer of the brand’s products is still unknown, but that doesn’t matter if the quality isn’t compromised. Hampton Bay has made its name for its durable and affordable kitchen and bathroom cabinets. You can easily find Hampton Bay products at Home Depot in-store or online. However, as a homeowner, if you’re looking for brand recommendations that’ll provide you with high-quality and luxurious cabinetry, you should opt for KraftMaid, Omega Cabinetry, Wood-Mode, etc.
Amongst the most commonly used appliances at home or in offices are ‘ceiling fans’. They provide ventilation within the area they are being used in and provide a cooling effect. The proper working of the fan blades is critical to your fan’s efficiency.
Importance of Fan Blades in Ceiling Fans
The speed of the fan blades determines the amount of air your fan is able to circulate. The fan blades are a crucial part of the ceiling fan; thus, one must consider checking this part of the appliance before purchasing.
Ceiling fans also come with a vast supplier brand market like any other appliance.
Hampton Bay is one of the well-known brands in the ceiling fans market, popular for providing high-quality ceiling fans with multiple styles and designs. Whether you’re looking for a modern style fan or a traditional one, Hampton Bay always has variety. The brand has surely become a user favorite due to its reliable yet affordable products.
Exploring Hampton Bay Replacement Fan Blades
There are a number of types of fan blades that Hampton Bay offers for replacement, including:
1. Plastic finishing- White, Black, Clear
2. Wood finishing- Oak, Cherry, Walnut
3. Metal finishing – Brushed Nickel, Bronze, Chrome
Fan blades are available in different shapes, styles, materials, and sizes. You can replace them according to compatibility with your fan.
So, one must consider all these factors before replacing their fan blades.
Where to purchase Hampton Bay replacement fan blades?
Any appliance you own is bound to damage and would eventually need a repair or a part replacement. Therefore, one must know where to replace their appliance’s parts.
Hampton Bay ceiling fans are also not an exception. I will suggest three trustable ways on how you can get your Hampton Bay parts replaced.
1. Contact the website called http://www.eceilingfans.com/ for replacing your Hampton Bay Ceiling fan parts, including the fan blades or call and order at the number 979-553-3260. Operational hours are 8:00 am – 8:00 pm (central), Monday – Saturday
2. Secondly, if you are a regular client of Home Depot and would prefer to get your fan blades replaced through them, you can contact them on their number 1-877-527-0313 and talk to the Hampton Bay agent. He/She will ask you all the details of your ceiling fan and help you find the correct replacement blade for your fan.
3. Try searching for the required part on eBay. Many parts are available on eBay, so you might want to try it.
Steps to Replace Hampton Bay, Fan Blades
Once you have found the right replacement for your fan blades, there is a series of steps that you must follow in order to replace the Hampton Bay ceiling fan’s blades correctly.
Preparing for the replacement:
1. Turn off the fan and disconnect it from the power source
2. Allow the fan to cool down first, then start working on it.
3. Gather the necessary tools required for replacement along with the replacement blades
Removing the old fan blades
4. Identify the blade attachment mechanism; you may take help from the manual guide with the fan or a guidance video from the internet.
5. Carefully unscrew or unclip the blades from the fan motor
Installing the replacement fan blades
1. Align the new blades with the motor housing
2. Secure the blades using the appropriate attachment method, taking help from tools.
Testing the new fan blades
1. Reconnect the fan to the power and observe the fan’s operation
2. Check for any unusual noises or wobbling
Maintenance and Care for Hampton Bay Fan Blades
Regular cleaning of the fan blades to prevent dust build-up:
As mentioned above, the fan’s efficiency broadly depends on its fan blades because the more efficient they are, the more air a fan can circulate. To ensure the proper working of the fan, its blades must be regularly cleaned to prevent dust from accumulating. Use gentle hands when cleaning the blades. You may use a vacuum to remove dust and wipe it off using a damp cloth so it’s fully clean.
Checking and tightening screws or attachments periodically:
Your fan is making unusual sounds, and you are wondering what might be the reason behind it. The problem may be with the fan blade screws, which might be loose. You must check if the blades of the fans are tightly screwed to the blade holder. If not, use a screwdriver and secure the blades.
A regular maintenance check of the fan blades and regular cleaning, in short, taking good care of the fan blades, may increase their life span.
FAQs:
Can I use replacement fan blades from other brands?
No! You cannot replace your present brand fan blades with other brands’ fan blades. Different brands have different manufacturers that create multiple different designs. Even in the same brands, you will have to replace fan blades with the same model replacement. This is because only fan blades of the same model fit in their blade holder.
How often should I replace the fan blades?
Ceiling fans have a maximum working capacity of 10 years; however, there is no specific time limit to replace fan blades. They are replaced if broken and no longer repairable.
Are Hampton Bay replacement fan blades covered under warranty?
All parts of the Hampton Bay fan (except the glass) have a one-year warranty; the replacement is also covered under this warranty.
Conclusion
The efficiency of the fan largely depends on the fan blades properly working. Thus, make sure to replace the fan blades when needed, as it is important for the proper functioning of the fan. Maintaining and cleaning the fan regularly is recommended; the more you care for it, its lifespan increases.
Hampton Bay Chandeliers are light fittings used to provide elegant ambient lighting. Over the years, Hampton Bay Chandeliers have become immensely popular for their aesthetic appearance that immediately captures attention. Moreover, their versatility suits the preferences of every customer, making it a perfect choice for everyone. Another thing that makes them popular is the affordability they provide.
However, sometimes these beautiful chandeliers can experience wear and tear in their parts. This might be due to any damage in parts, electrical problems, short circuits, or even a desire to change its aesthetic look. Fortunately, you can replace parts on a Hampton Bay chandelier.
There are multiple replacement parts of them available in the market. For instance, bulbs, glass shades, chandelier crystals, prisms, hanging ornaments, electric components, hardware parts for ceilings, etc. Therefore, you can easily find their replacement parts to renew your splendid Hampton Bay chandelier.
Where to Find Replacement Parts?
Even though the replacement parts for the Hampton Bay chandelier are available in the market, it is pretty annoying to find the suitable one. Many people don’t know the search procedure or the places selling them. Therefore, we have discussed how to find the replacement part for your Hampton Bay chandelier.
How to Find the Part Number for Your Chandelier?
Hampton Bay chandeliers have different models and are composed of multiple parts. Each model and part has its unique number. This facilitates cataloging, ordering, technical identification, and efficient customer support.
Therefore, the first step is to find the part number of the replacement part of the Hampton Bay chandelier. For this, you can:
Review the Product Manual:
The product manual contains all the model and part numbers information. Check out the manual to find the part number of the replacement part.
Contact the Support Service:
If you are unable to find the part number in the manual, contact the customer support of Hampton Bay. You can share the model number or even photos of the chandelier. They will effectively guide you in this matter.
Check the Hampton Bay Chandelier:
Examine the chandelier properly. The part numbers are either engraved or imprinted on the parts. If you look closely, you will find the part number.
Research Replacement Parts Website:
Research the replacement parts on the Hampton Bay website. You can also search online through the pictures of your chandelier. Some sellers might have been selling the replacement parts.
Consult Replacement Parts Dealers:
Some resellers and replacement parts dealers of Hampton Bay chandeliers have information about them. You can visit a nearby reseller store or contact them. They might assist you in getting the part number.
List of the Places Selling Replacement Parts
The following is the list of five expected places where you can get the replacement parts for the Hampton Bay chandelier:
Hampton Bay
Hampton Bay itself sells replacement parts for different models of its chandeliers. Therefore, it is the most convenient place to purchase authentic and affordable replacement parts for chandeliers. They even have a replacement parts department. Hence, you can directly contact them through the phone numbers provided on their website.
Amazon
Amazon is an online retailer where you can find the chandelier’s replacement parts. You can match the photographs or part numbers of replacement parts provided by them. This will help in getting the exact part according to the chandelier model.
Ebay
EBay is the world’s online marketplace. It helps in selling and buying products between third-party sellers and purchasers. You will easily find Hampton Bay chandelier replacement parts there—for example, silver lighting parts, corded lighting parts, LED lighting, etc.
Home Depot
Home Depot is the major reseller or retailer of Hampton Bay. It has almost all the range of Hampton Bay products including chandeliers. Therefore, you can also purchase replacement parts for the chandelier from there. You visit their website for more details.
Houzz
Houzz is an online forum that is dedicated to serving home interior and lighting improvements. They also sell Hampton Bay lighting products. Besides this, they have several Hampton Bay chandelier replacement parts. Therefore, you can check their website to purchase the part.
Pros and Cons of Buying Replacement Parts from Different Sources
As mentioned above, the Hampton Bay chandelier replacement parts are available at different places. It is your choice where you want to buy these parts. However, there are certain pros and cons of buying them from different sources:
Pros
The pros are as follows:
Different Price:Different replacement selling places offer different prices than others. Try to purchase from multiple sources. In this way, you might get a discount or save money.
Multiple Options: If you purchase from different sources, you will have a wide range to select from. This increases the chances of multiple options. Also, it will help you buy the best one.
Availability of Parts: As mentioned earlier, finding the replacement part is quite annoying. It becomes more irritating when the parts are not readily available. Therefore, searching different sources increases the availability of replacement parts.
Convenient Service:
Since multiple sources are available for purchasing replacement parts, you can focus on the one whose shipping or policies are convenient.
Cons
The cons are as follows:
Warranty Issues
Hampton Bay chandelier comes with a warranty of certain years. If you purchase replacement parts from different sources, it might challenge the warranty. The chandelier’s warranty could decrease due to using local replacement parts.
Unauthorized Sellers
Unauthorized sellers mostly sell low-quality products as compared to authorized sellers. Therefore, there is a risk that the replacement parts sold by them are counterparts. So, ensure the replacement parts are original; otherwise, you will buy non-compatible parts.
How to Install Replacement Parts?
After finding the compatible Hampton Bay chandelier replacement part, you should know how to install it. This will ensure that your chandelier is lit properly.
Instructions
Different parts in a chandelier need different procedures for their replacement. However, a general procedure can be followed to install the replacement part in the Hampton Bay chandelier. Following are the instructions:
Step 1: Turn Off the Chandelier
For safety reasons, turn off the power of the chandelier. This can be done by turning off the socket electricity or the whole fuse box. Hence, it will prevent any short circuits and injuries during the replacement of parts.
Step 2: Eliminate the Malfunctioning Part
Eliminate the damaged or broken part from the chandelier. It includes removing light bulbs, broken glass shades, unscrewing, unwinding components, etc. However, if you are changing wires, first inspect them. After that, remove them carefully.
Step 3: Follow the Guide
For installing a particular chandelier component, use the instruction manual provided by Hampton Bay. By following the guide, install the specific replacement part. Fix it properly and make sure it is secured correctly. If you have dismantled the whole chandelier, assemble it. Cross-check all the wirings and connections.
Step 4: Turn on the Chandelier
After installation, turn on the electricity from the socket or the fuse box. Check if the replaced part is working properly or not. If there is any malfunctioning, try to follow the procedure again.
Step 5: Check for Safety
If the installation is successful, give the chandelier a final inspection. This is to make sure that the chandelier is working effectively.
Challenges Encountered During Installation
Installing Hampton Bay chandelier replacement parts is easy and smooth. However, due to some reasons, you might encounter some challenges during installation. Some of the common challenges are listed below:
Component Suitability Issues
Replacing damaged parts becomes challenging when the replacement part of the chandelier is not suitable. Sometimes, even the correct part has slight differences due to different models of Hampton Bay chandeliers. Therefore, the replacement component should be checked accurately before installation.
Electrical and Wiring Problem
The electrical and wiring system of the Hampton Bay chandelier is specific and somewhat complex. A beginner who is unfamiliar with changing wiring can become perplexed. Securing each wire and electrical component in the chandelier is crucial.
Parts Handling Challenge
Chandeliers are heavy lighting fixtures. Therefore, their parts are also heavy and delicate at the same time. Each part requires proper care and support. Moreover, handling parts while installation requires proper attention and focus. Otherwise, it will result in damage and injuries.
Unavailability of tools
Installing replacement parts requires unwinding some parts, unscrewing, disassembling, etc. This questions the availability of appropriate and suitable equipment. Hence, keep sure that you have all the important tools needed for installation.
Incomplete Installation Instructions
For installing a particular component, specific instructions are required. If the instructions are incomplete or unclear, it will cause short circuits or damage. Therefore, before installing any part, read the instructions carefully.
Tips for Troubleshooting
Like any other electrical component, Hampton Bay chandeliers sometimes cause problems. Here are the five most common problem troubleshooting tips that you can apply to the Hampton Bay chandelier:
Check Power Supply
Sometimes the power supply to the chandelier is not sufficient. There could be a disconnection or loose connection of the chandelier with electricity. Make sure it is getting enough power supply for lighting effectively.
Inspect the Connections
Chandeliers require proper assembling of all their parts. If any connection is loose or disconnected, it won’t illuminate the light. Also, all the parts should be present, and none will be missing.
Look for Wiring
The wiring of the chandelier is one of its most essential elements. If the wiring is damaged or if there is any short circuit, the chandelier will stop working. Therefore, carefully inspect every wire and electrical component.
Check the Mount and Chain
The mounting and chain are the primary parts of hanging the chandelier to the ceiling. The chandelier chain is responsible for keeping it hanging. If the chain is loose, the chandelier might appear unstable and may fall ultimately. On the other hand, the mount keeps the chandelier fixed to the ceiling. If it is loose, it becomes impossible to withstand.
Replace Screws or Bulbs
Loose screws result in disassembling the chandelier. Therefore, all the screws should be fastened tightly. Loosely connected bulbs cause flickering. This might disrupt the lighting of the chandelier. Therefore, inspect all the bulbs and see if they are connected securely without any damage.
In short, Hampton Bay chandeliers are highly recommended in the market. But due to certain factors, they might face difficulty in performance. This is when you should know where to find the compatible replacement part of the Hampton Bay chandelier.
Also, knowing how to install these replacement parts helps restore the chandelier’s lighting. I hope all your queries regarding the Hampton Bay chandelier replacement parts are answered. If yes, then leave a comment or share this helpful content with Hampton Bay chandelier enthusiasts.
Hampton Bay offers various lighting products, among which the Hampton Bay pendant lights are currently the most popular. Every year a new decor trend comes if we look a few years back, there were tube lights, then came single light bulbs, then chandeliers were in fashion for quite a long time, and after that, a huge time period of LED lights and now a trend of pendant lights.
Most people mix pendant lights with chandeliers or ceiling lights; however, they are pretty different. A pendant light has a light fixture suspended from the ceiling with only a single light bulb incorporated in its fixture, while a chandelier is suspended to the ceiling with a chain with multiple light bulbs surrounding a middle sphere.
A chandelier is used in a big room where too much lightning is needed; it was also used in historical times in big hallways, whereas pendant lights look good but don’t give enough light in the room; it is mostly incorporated in small rooms.
Pendant lights need maintenance. Certain parts need to be replaced or fixed with new parts. Without maintenance, there is nothing that can last long. There is sometimes replacement of bulb, fixture replacement, socket, and shade replacement for a fine color that matches your taste. Sometimes, if you don’t maintain it, it can lead to short circuits, untidy fixtures, and dusty chains/rods or shades.
Common Hampton Bay Pendant Light Issues:
Many issues can occur with pendant lights, some of them are listed below:
Light bulb
Socket
Fixture
Light bulb:
A fused light bulb can also be a problem because the bulb inside the shade is fused, so it might be time to replace it with a new one. It might have sparked or fused due to some electrical short circuit.
Socket Tab:
The socket tab is located inside the pendant shade. It might be so pressed back that the electricity cannot reach the bulb and doesn’t turn on. You should turn off the light switch and stick your hand in to see if they are pushed beyond the border of the electric supply; remember to turn off the switch before sticking your hand in.
Fixture Replacement:
A fixture replacement can give your house a new look; you just have to change the fixture of any chandelier pendant lights and give it a fresh look.
How to replace them with new ones?
Bulb Replacement:
The type of bulb mainly used in pendants varies. Here are some different types of bulbs used in pendant lights with how to determine which type of bulb suits best and how to replace a bulb step-by-step guide.
G9 halogen bulb 120V 25W T4 type 2 pin base.
Bellevue GP9144 wide plugin exposed black indoor lightning.
Phillips LED 544932
Edison light bulbs vintage 60-watt E26 base
15W A15 bulb medium base 130V
Yansun 60 watt ST64 dimmable E26 base
Lamsky E14 European base LED filament
The best way to determine which type of bulb will fit best is; first, you need to measure which fitting or cap type you need. Knowing the proper cap size is essential, or your bulb won’t fit.
Choose whether you want a CFL, LED, or halogen-type bulb.
Now, determine how much lightning area you would like it to cover, and according to that, choose the watts of the bulb.
You should choose the watts according to your expenses because the electricity bill will increase if you use a high-watt bulb.
Now choose the color of your bulb.
Lastly, buy the best one which fulfills all your requirements.
Step-by-step guide on how to replace a light bulb:
Turn off the bulb’s switch; always turn off the switch before replacing the bulb.
Next, let the bulb cool down because if you take out a hot bulb, you will not only burn yourself but there is a high risk that it might explode.
Now, a light bulb is on the ceiling, so use a ladder to climb and reach the bulb.
It depends on which type of bulb you have; if it is a bayonet mount, slowly and firmly push the bulb upward and pull out; if it is a screw-type bulb, then firmly twist it and pull out.
Now, take the new bulb and fit in it the same way as you have taken them out.
Socket Replacement:
Many lights have different types of socket, but pendant lights socket is different, as you have read earlier, so if the socket base gets either gets faulty.
Fluctuated,
Burned
Water damaged.
The wire isn’t reaching the bulb.
If there is a problem like anyone of this, your light will spark or if there is too much electric supply it will burst. Or sometimes doesn’t even turn on. These are the signs that might be a problem with the socket of the light.
These are the tools that you need to replace a socket:
Ladder
Non-contact voltage tester
Voltage tester
4 in 1 Screwdriver
Pliers
Wire cutter
Needle nose pliers
Electrical tape
New socket base/ light fixture
Step by Step guide on how to replace the socket of a pendant light:
Turn off the switch, unravel the canopy and fixture, cut the wires with a cutter, and separate it from the ceiling.
To check if the power is off, take the noncontact tester and get it close to each wire. If it lights up, a power supply still waits for the tester’s light to go off.
Now unscrew the fixture and leave the rest of the wire in the electrical box.
Now turn the light on to the switch to test if it is hot with a noncontact tester. Make sure the colored wire has power.
Now with a voltage tester, connect one end to the color wire and the other to the ground or bare copper wire. If the light turns on, the ground wire has a current supply. Call an electrician to fix the ground wire if it doesn’t light.
If there is a current in the ground wire, if it lights up now, you can proceed further by turning off the light switch.
Now, attach the ground copper wire, if not present, around a screw with three turns and put the screw into the threaded hole.
Now, assemble the mounting strap by adjusting the canopy from the ceiling part, lighting it inside the canopy by ⅜ inches of the thread of the screw collar, now lock it by a canopy nut.
Now add the crossbar and put all the wires to one side, screw it into the ceiling, and don’t cut wires if you have a hanging light to adjust the length.
Add the fixture in the middle and get someone to hold it while you attach the crossbar.
Now connect the neutral fixture wire with the white wires if you have a lamp-style wire, then the silver/white wires are neutral, and black is the hot wire.
The unmarked wire is hot. Connect it to the hot wire in an electric box that is either red or black; now, complete it by loping the ground wire against the screw and connecting the end from the fixture to the electric ground wire.
Lastly, close the canopy back with the ceiling at the screw and canopy screw, add the end onto the mounting strap so it looks stylish and is fixed, and turn the light on to see if it works.
Caution:
If there are aluminum wires used in your home, don’t mess with them and call an electrician to work with them.
3. Light Fixture:
Here is how you can replace your light fixture with a new one:
The tools you need are:
Wire cutter
Screwdriver
Circuit tester
Voltage tester
Light fixture
Connecting wires
Ladder.
First, turn off the light’s power supply to replace the fixture.
Now take the fixture off the ceiling and cut all the electric connections.
Now attach the new fixture and tighten all the screws if loose, don’t tighten too much because it needs to manage the weight of the pendant.
Now connect all the wires and fix our fixture. Now add the shade and insert the bulb.
You have a brand new fixture, upgraded pendant light.
Identifying, Ordering, and installing Replacement parts:
Firstly, precisely identify the problem of your object so that you can tell the service efficiently and exactly which part of your object needs to be replaced.
Secondly, you need to know your item’s exact model and model number if you have thrown its box, then see if you can find the UPC and tell your service provider. If you cannot find any of them, show them the picture of your broken item; that would be enough for them to figure out the exact item.
Now contact the Hampton service providers for the item that needs to be replaced, given all the collected information they ask for.
Now select the equipment you need to order and order them.
Now if they say you have to send the product to us then.
Wrap your damaged product inside bubble wrap, put a sticker on it, and send it.
After 5 to 7 days, your order or your repaired object will be sent to you.
Now that you have your replacement, it is time to install them; read the manual to learn how to install them perfectly.
Take precautions like wearing gloves and turning off the switch if installing any electrical appliance.
Online Website For Replacement Parts:
There are several online websites where you can find the replacement parts for Hampton bays, such as Home Depot, Amazon, and eBay (only if you know the exact information),
Step by Step guide on how to install a pendant light:
Now if you have a brand new product or a new pendant light, here is a step-by-step guide on how to install it:
Firstly, close the switch or power supply where it needs to be installed.
Then take off if anything was previously attached.
If not, take a crossbar and get all the wiring on one side; now, attach the rod to the middle of the crossbar.
After that, attach the canopy and all wires attach to the one in the electric box.
Now the wires that are under the canopy insert them in the rod.
Next, attach the rod to the canopy.
Hang the bulb in the socket, and now hang the shade of your pendant light.
Now turn on the switch and have a fashionable hanging pendant light.
Maintenance and Care tips:
Electrical appliances like fans and lights need cleaning, so be sure you don’t get too dusty and clean them quite often, thrice a month. If you live in an area with too much dust, clean them every week.
They mustn’t get water inside them. They must be away from water and look out if your roofs leak. They are the main reason for water damage.
Sometimes an electrician leaves connections between electrical objects open, so be careful and tighten all your open connections and call a pro electrician to do your work occasionally. Check your electrical connection for any misconceptions, which may lead to fire, short circuit fluctuation, and many more problems.
Conclusion:
When their lights or fans get damaged or malfunction, many people give out the old ones and buy new ones. Still, it is sometimes best to repair it because only a few tweaks or little parts will be replaced, and it will work like brand new it not only saves you a lot of money and gives your objects a long life to live. So, rather than spending much money, spend less and repair your product.
I hope this blog will help you repair and care for your pendant lights.